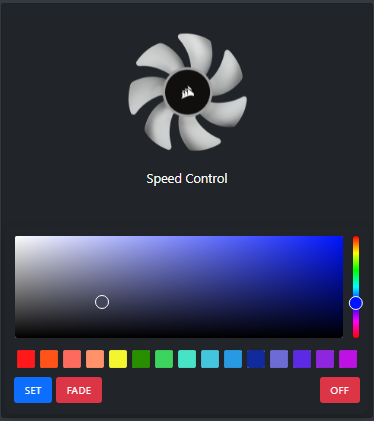
NodeMCU RGB LED strip control over WiFi
1x nodemcu (I used v3)
1x RGB LED strip (5 meter)
3x TIP41c transistors (or any with support 1.7 Amper)
3x small heat-sink for transistors (optional)
3x 3.3k-ohm resistors
1x 12v pwm fan
1x 12v 6A power supply
1x USB cable
1x breadboard or circuit board
some wires
Arduino IDE
Server.ino -> Main Arduino app source
Color.h -> Color manager header
Color.cpp -> Color manager source
mainPage.h -> Web-Server HTML file
assets -> Static CSS/JS files which can accessed from CDN
I've uploaded files (minifed) to ArvanCloud CDN due to it's higher performance. Here's the links:
https://arduino.s3.ir-thr-at1.arvanstorage.com/style.min.css
https://arduino.s3.ir-thr-at1.arvanstorage.com/fan.min.css
https://arduino.s3.ir-thr-at1.arvanstorage.com/script.js
https://arduino.s3.ir-thr-at1.arvanstorage.com/fan.png
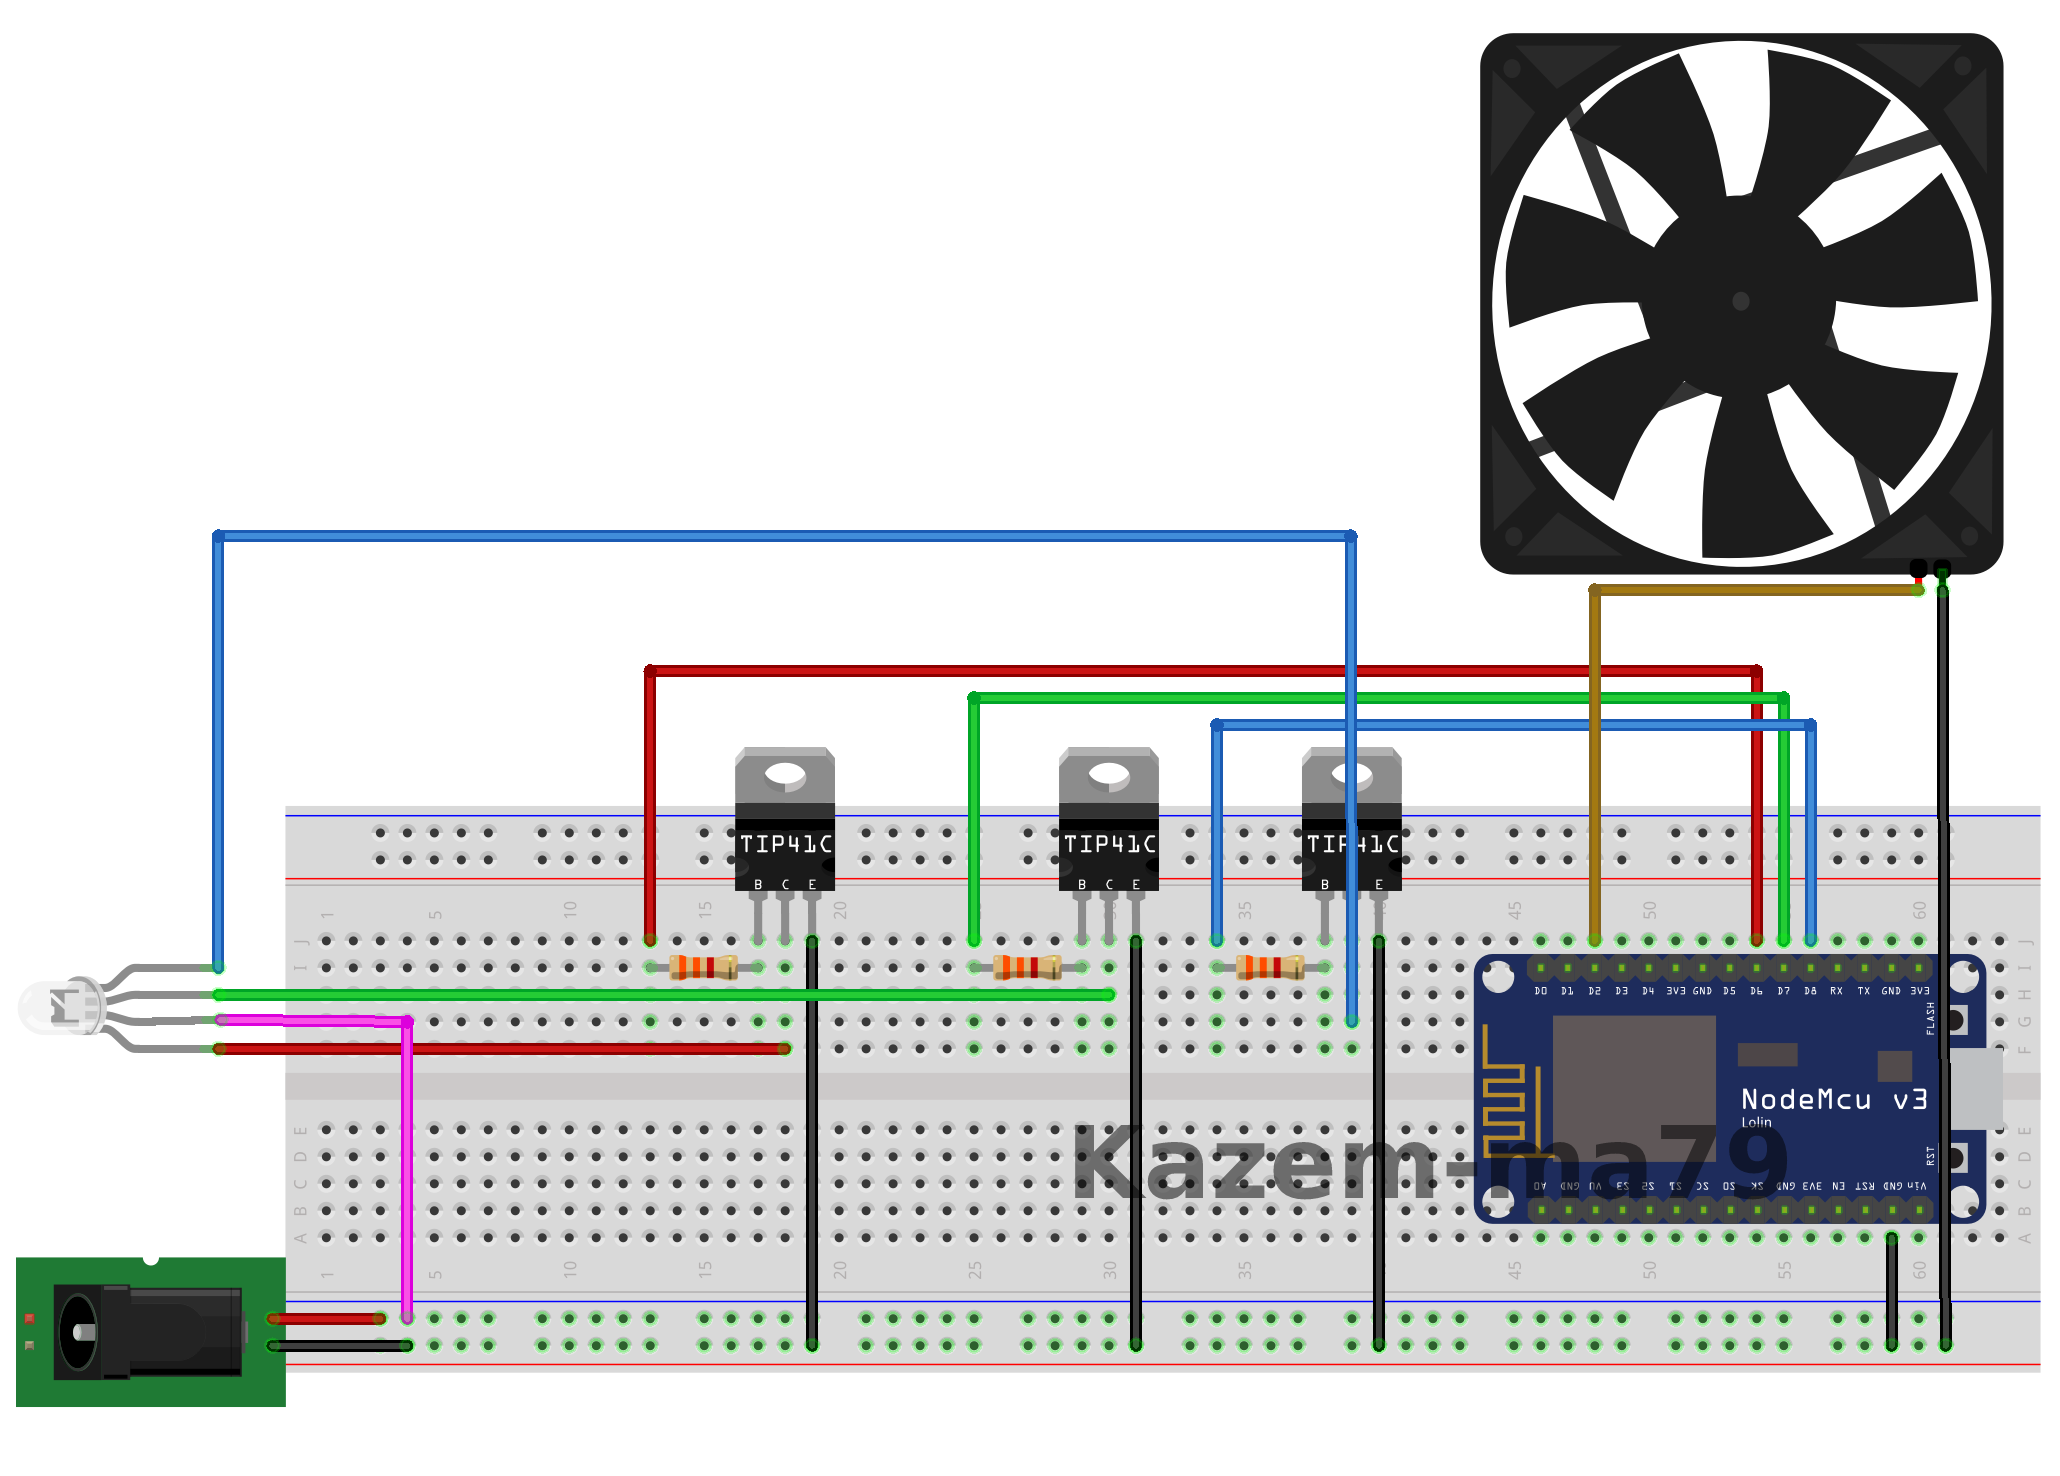
Make the curcuit like the image below.
Change your WIFI name, password and IP address in Server.ino line 10,11,12.
Connect your NodeMCU (or any arduino based board) via USB to PC and upload sketch to board.
Full guide will be available on instructables.
If you want board to get IP Address from DHCP remove 12,13,14,41 lines from Server.ino file.
You can access control panel from NodeMCU's IP address which is shown on Serial Monitor while device is turning on.