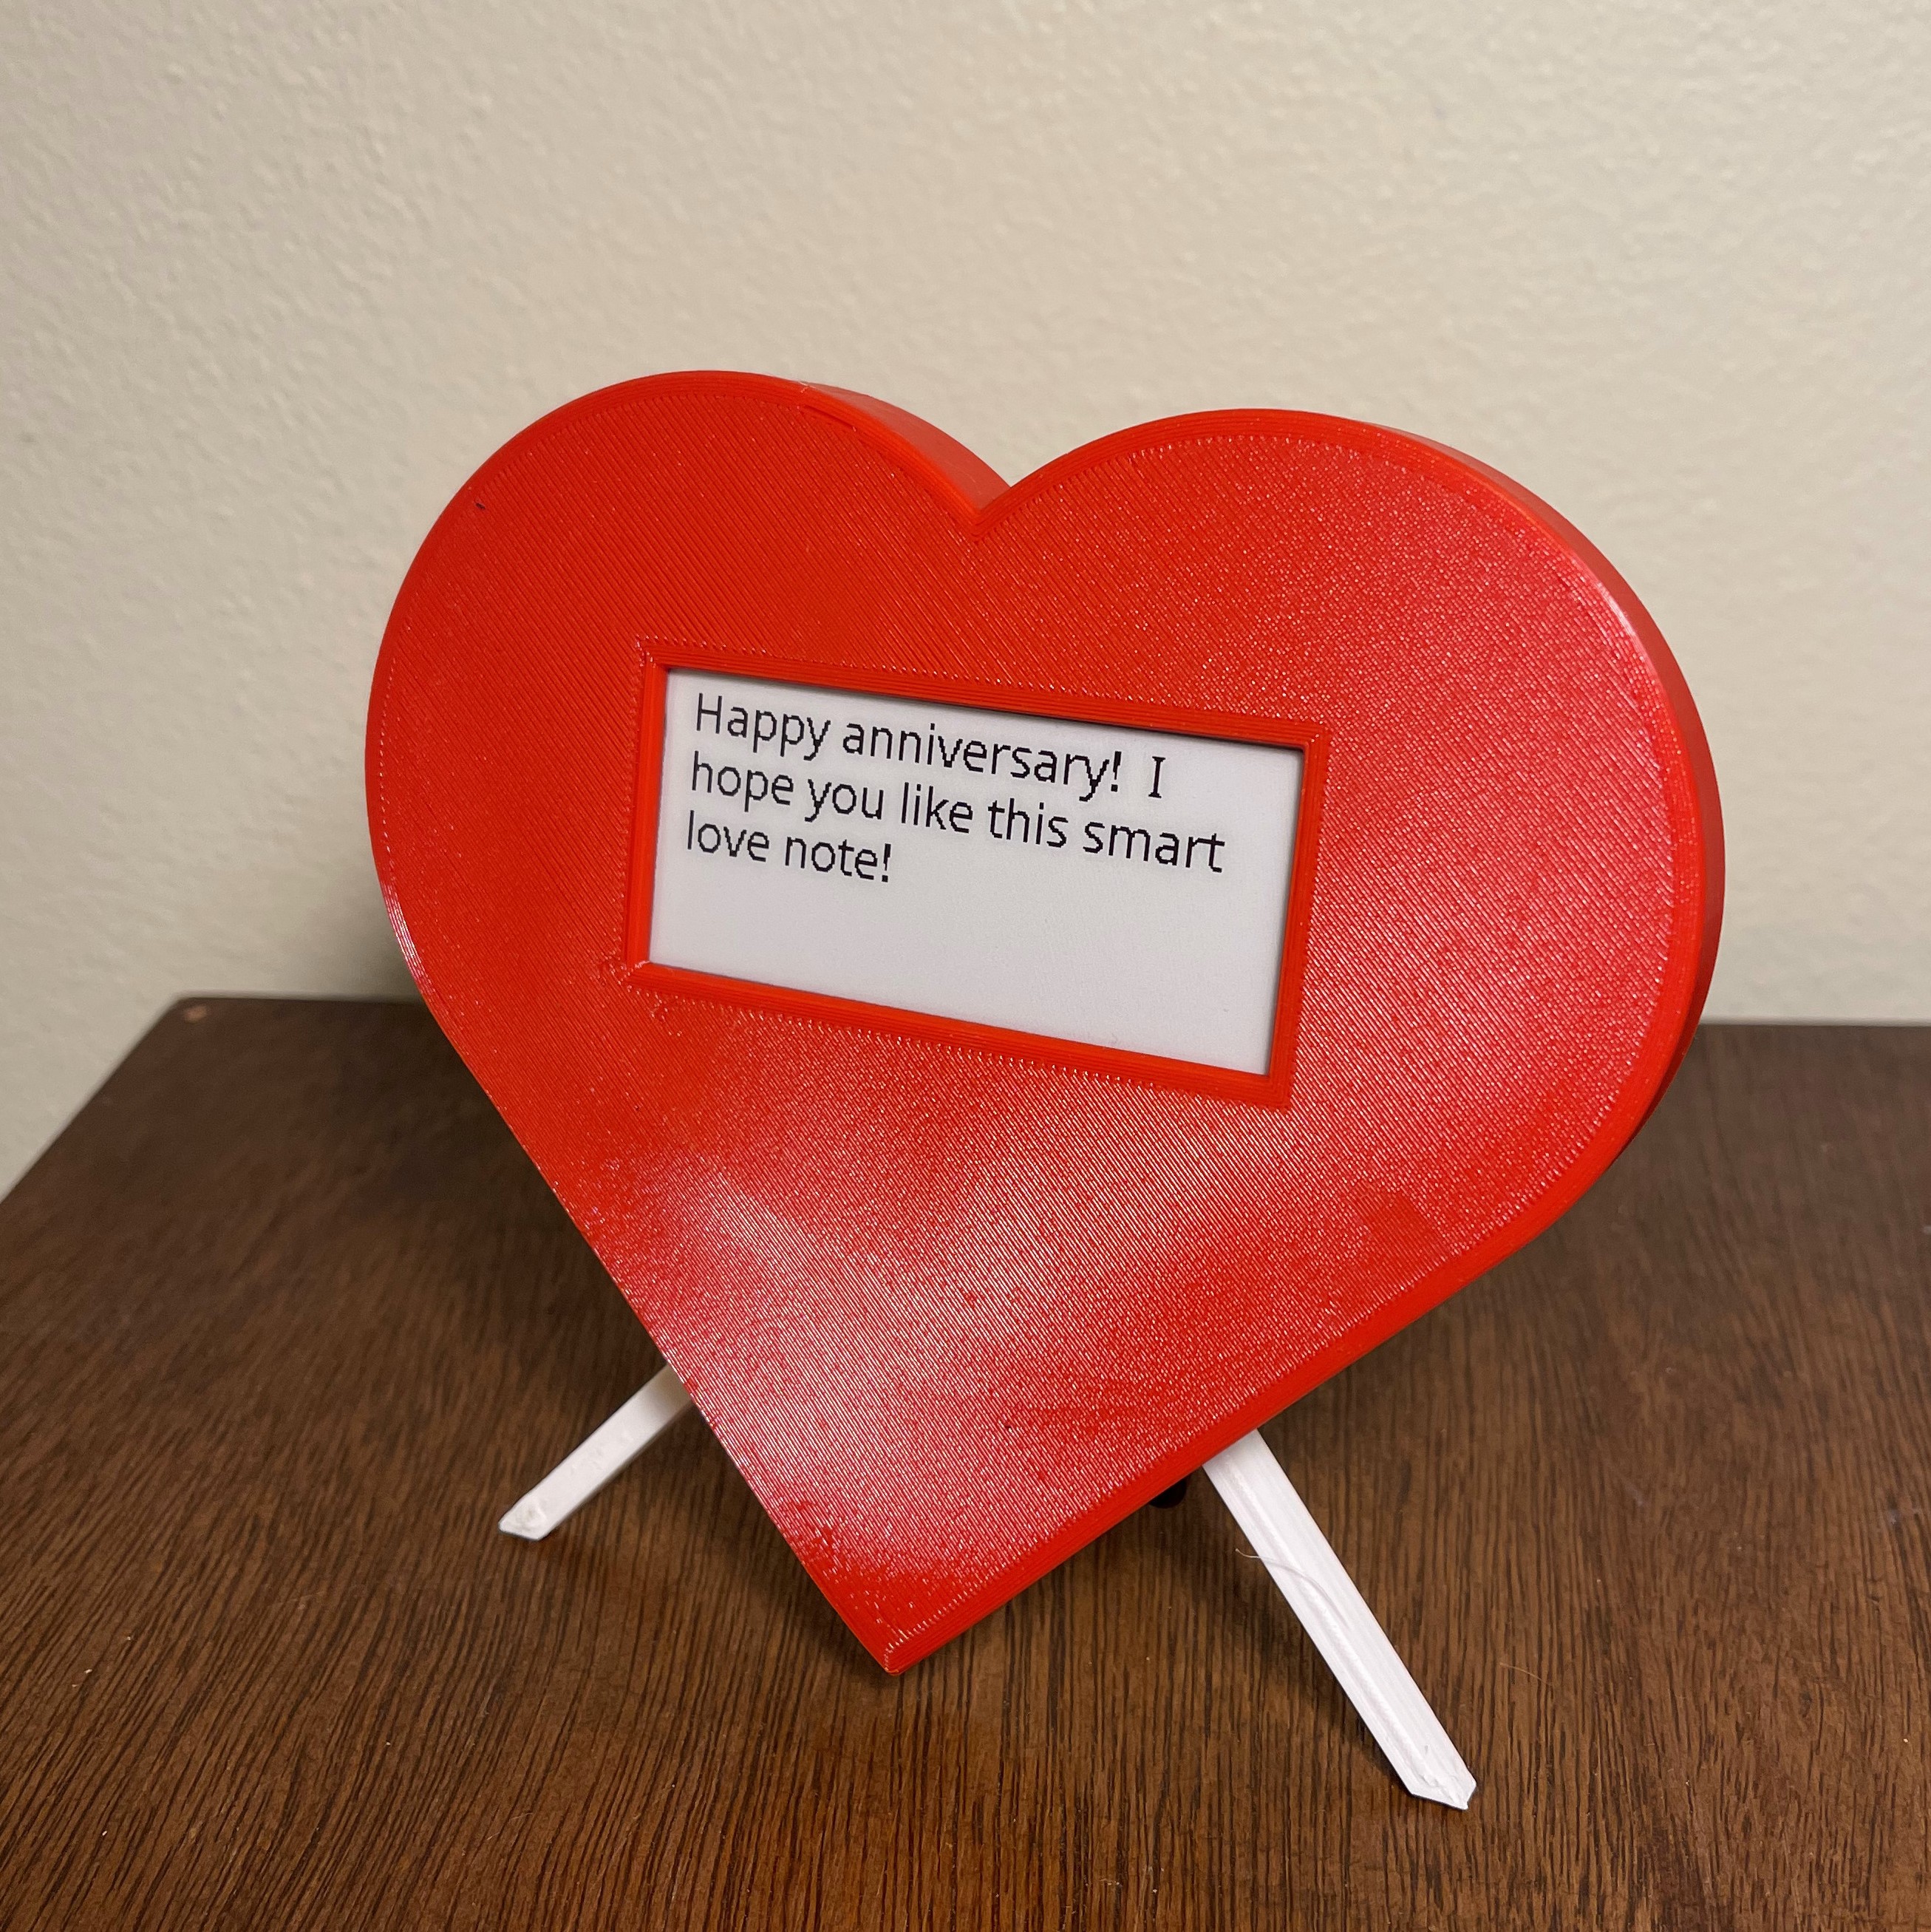
This was an anniversary project for my wonderful girlfriend. The device outputs various messages from a raspberry pi zero to a 2.9-inch e-paper display. The stored love note text file, which has several messages that randomly cycle, can be added to or temporarily overridden with a unique message that is not saved to the stored file. The mode of operation depends on the time of day; the device is capable of displaying messages for morning mode (set morning messages), random message mode (cycle through stored messages), evening mode (set evening messages), and an override mode (temporary message display).
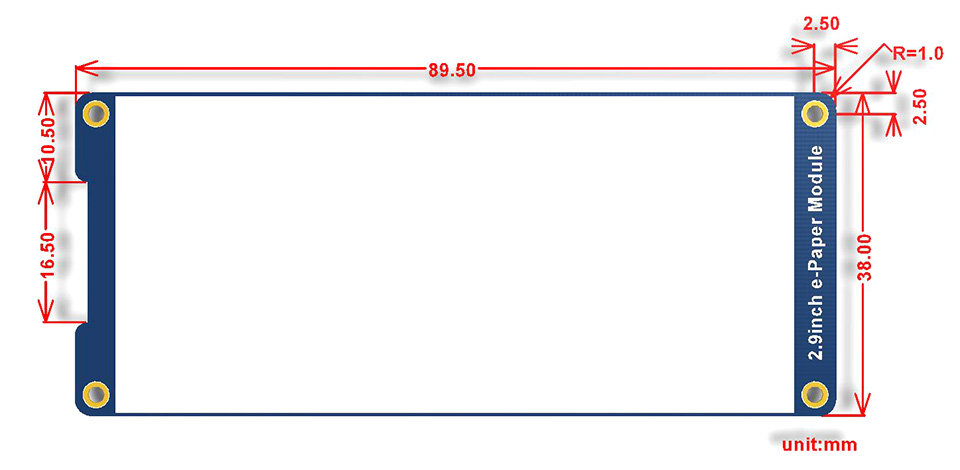
Interfacing with the display was a difficult part of coding for me, and out of my comfort zone for the most part. I had a lot of help from a software engineering roommate and the manufacture website for the model of e-Paper display I had, the 2.9inch e-Paper Module B. Using the given example code for the display, I had a solid foundation for starting the love note output. Rather than creating something from scratch, I widdled down the parts of the example code that worked for this project.
I started learning about how to pull emails from the Gmail client using python. Using an article by Humberto Rochas, that focused on sending and receiving emails with python gave me a great start for getting emails from Gmail to python.
In order to get past Googles security I had to grant the account less secure app access. To do that I navigated to
Google Account Settings > Security > Less Secure App Access at the bottom of the page, set that to on. This got me past the [AUTHENTICATIONFAILED] Invalid credentials (Failure) error that Rochas example was giving me when running their example.
As for using the IMAP python function I found this article very helpful with IMAP formatting. From there I was able to find a way to pull emails filtered by my personal email.
I ended up using two imap.search functions that worked for me. The first was helpful for reading emails specifically from my personal email to the project email, the second focused on the emails from me as well as making sure they were unread. Once read by the search function the email would be marked as read which is very helpful for the final product but not helpful for the testing phases of the code.
status, data = mail.search(None, 'FROM My-Personal-Email') #use for testing
status, data = mail.search(None, 'FROM My-Personal-Email UNSEEN') #use for final version that will uncheck email
This code needs the file EmailLogin.txt that should be saved in /home/pi/ directory with three lines including an email, that emails password, and a personal email that the mail search will identify target messages by. There is an example file in the GitHub directory.
I used a raspberry pi zero and purchased an AIO kit from CanaKit. The package comes with an power cord and a formatted SD card with NOOBS OS to save some time.
Following the SSH guide from the raspberry pi website I was able to get a SSH key from the Pi to associate with github in order to clone and push changes if needed. The following commands were used to copy the pi SSH key and add it to my account on GitHub. The SSH repository link is found under the code tab on the main project GitHub page.
cd .ssh
cat id_rsa.pub
After adding the API key to my GitHub account page I cloned the repository on the pi with the following commands.
sudo apt-get install git
git clone git@github.com:LazerGerraldo/E-Paper-Love-Note.git
git checkout -f HEAD
Additionally the installation library for the e-Paper display is required found on the Waveshare github page. I will include the required commands below.
sudo apt-get update
sudo apt-get install python3-pip
sudo apt-get install python3-pil
sudo apt-get install python3-numpy
sudo pip install RPi.GPIO
sudo vim /etc/rc.local
added line in rc.local
In order for the pi to start the program on boot the line python3 /home/pi/E-Paper-Love-Note/main.py was added to the file rc.local as shown in the tab below.
rc.local file changes
#!/bin/sh -e
#
# rc.local
#
# This script is executed at the end of each multiuser runlevel.
# Make sure that the script will "exit 0" on success or any other
# value on error.
#
# In order to enable or disable this script just change the execution
# bits.
#
# By default this script does nothing.
# Print the IP address
_IP=$(hostname -I) || true
if [ "$_IP" ]; then
  printf "My IP address is %s\n" "$_IP"
fi
python3 /home/pi/E-Paper-Love-Note/main.py
exit 0
The pi did not realize what the correct time zone was. After changing the time zone with sudo raspi-config the program worked.
There was not a lot of documentation as to what pins on the display header, connect to the pi. I found the raspberry pi GPIO pin-out, and followed the manufacture website as well as the table below.
| Function | Wire Color | Pi Pin Number |
|---|---|---|
| VCC(3.3 V) | Grey | 01 |
| GND | Brown | 06 |
| DIN | Blue | 19 |
| CLK | Yellow | 23 |
| CS | Orange | 24 |
| DC | Green | 22 |
| RST | White | 11 |
| BUSY | Purple | 18 |
*I actually had the ground wire connected to pin 03 GPIO02 rather than the ground during the whole testing process.
This was one of the areas that I was more comfortable in at the beginning of this project. I used OnShape a free CAD software with tons of video tutorials online. You can see the project case design files here and export any of the .stl files for 3D printing.
Most of the design process involved measurements. Most of my time was spent using calipers and measuring things multiple times, however these schematics for the raspberry pi zero, and the e-Paper display from the manufacture website were very helpful. The display was on a PCB with standoffs making the height measurements a bit difficult. Next time I will do more sketching and designing before working on the CAD model. I used 3x hex socket head countersunk screw m3 x 8mm to attach the two parts of the case together two in each corner and one at the base of the heart.