This is a touchpad that you can build with low cost conductive materials (such as conductive paint) and an Arduino. It works using the principle of voltage triangulation. When you touch the conductive material, you create a new path to ground, and this lowers the voltage at the nearby voltage probes. Using this effect, we can triangulate the position of your cursor. We use Wekinator (a machine learning program that uses neural networks) to work out the mapping between the input voltages and cursor position.
- Arduino
- 9 alligator clips
- 9 jumper wires
- Conductive material. In this demo, we use paper painted with conductive paint, but the basic concept should work with many different conductive materials. Here's a list of different materials you can experiment with. You'll need to choose a material with a reasonably high resistance.
- Software: Arduino IDE, Processing, Wekinator
-
Paint paper with an even coating of conductive ink.
-
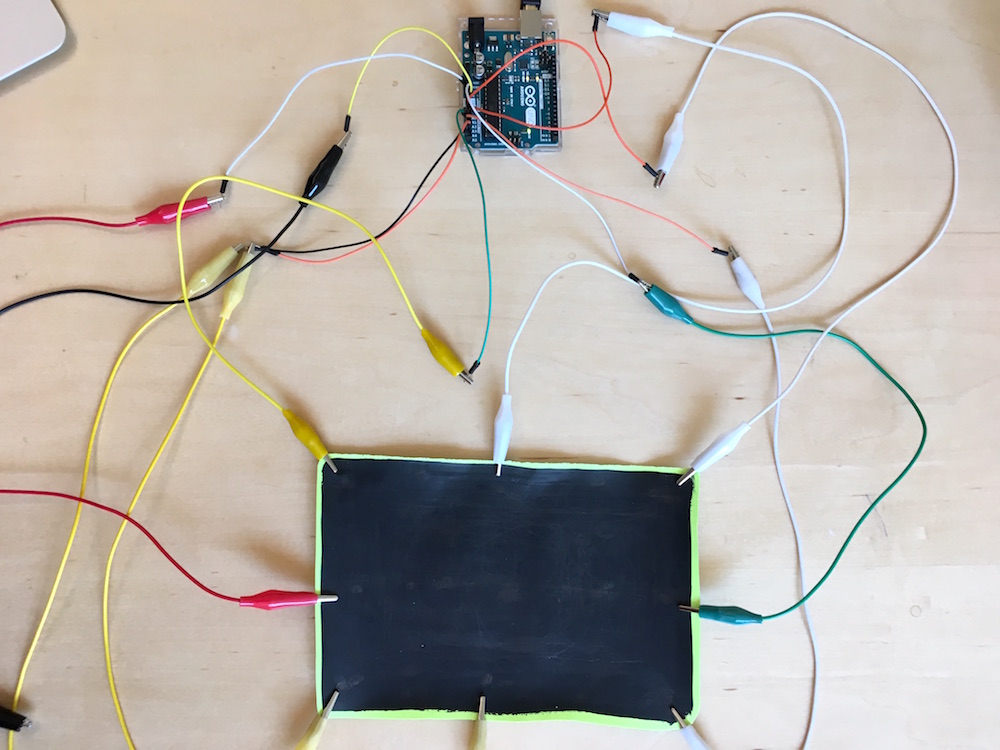
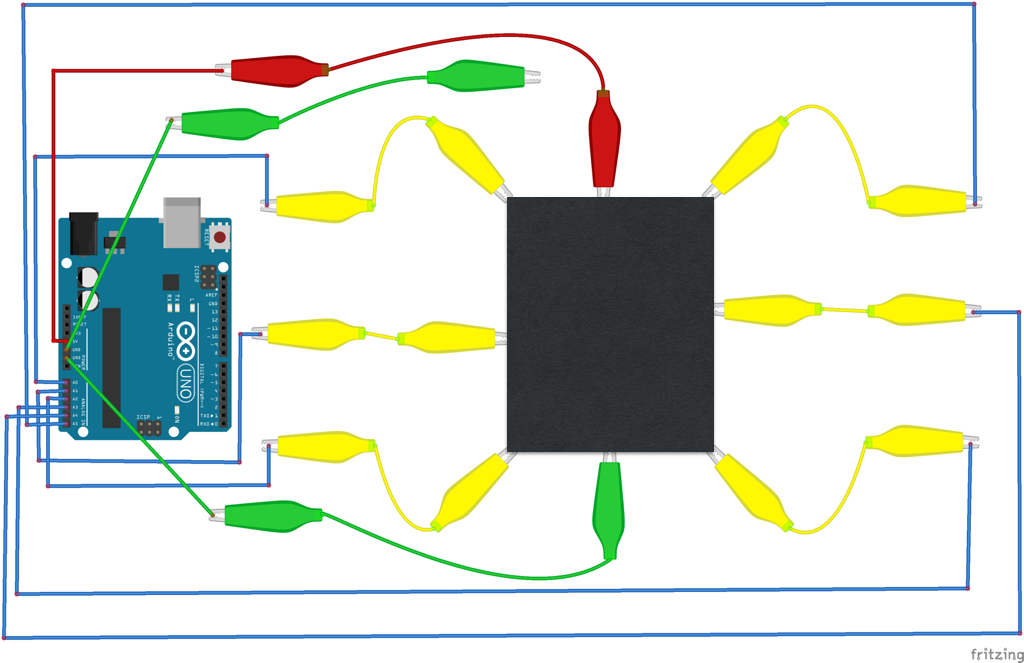
Assemble circuit.
The conductive patch is hooked up to 6 voltage probes, a 5V voltage supply, and a ground. Make sure the alligator clips are making good contact with the paint. The second ground alligator clip (the one disconnected in the wiring diagram) will be our cursor, using which we'll draw on the touchpad. Try to ensure that the different alligator clips or wire leads don't touch each other directly.
-
Open the Arduino code in the Arduino IDE.
Verify & upload the code to the Arduino.
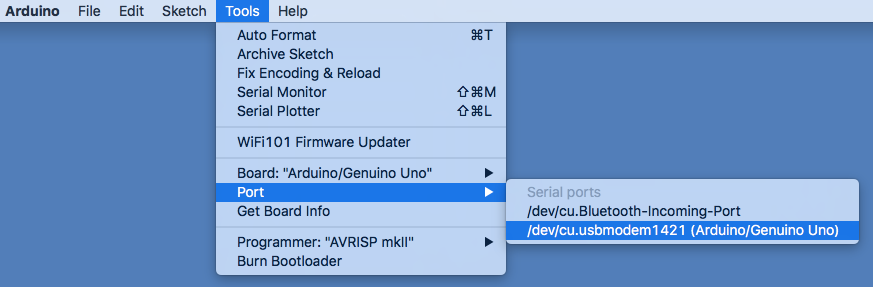
If you get a 'problem uploading to board' error message, you may need to tell the Arduino IDE which port your Arduino is connected to (under Tools > Port). The exact port will be different depending on your computer setup, it might look something like this.
To test input, open up the serial plotter (Tools > Serial Plotter). If it works, you should see something like the below graph when you move the cursor around the touchpad.
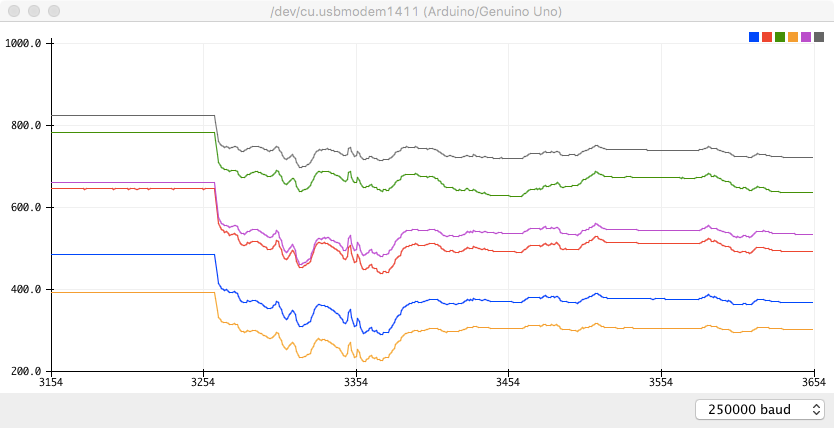
If you don't see this, check that the dropdown menu is set to 250000 baud (this is the rate at which the Arduino is currently sending data over the serial port).
Important: Remember to close the serial plotter when done to free up the serial port.
-
Open input Processing sketch (input_touchpad) using Processing.
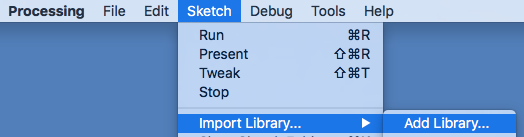
You'll need to install the oscP5 library. To do this, navigate to Sketch > Import Library > Add Library. Search for oscP5 and install it.
Run the sketch. You may need to tell it which port the Arduino is connected to. To do this, look at the output of the sketch. You should see a list like this:
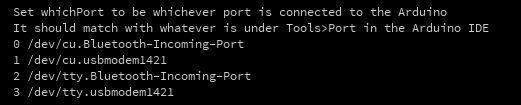
Find the number corresponding to the port connected to your Arduino (on our computer this is 1). Then alter the following line of the Processing code to match your port number.

Now run the sketch. If it works, you should see the following screen.
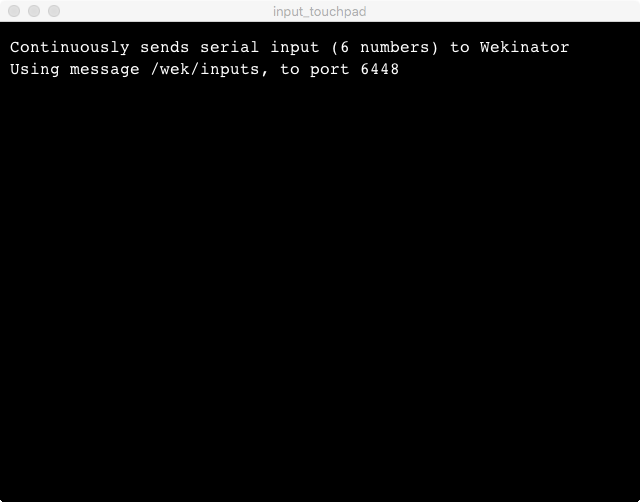
This sketch listens for serial messages from the Arduino and streams the 6 voltage values to Wekinator over OSC port 6448. OSC is a way to send messages from one program to another on your computer (or between computers, although we won't use that here).
-
Run output Processing sketch (output_cursor) using Processing. If it works, you should see the following screen.
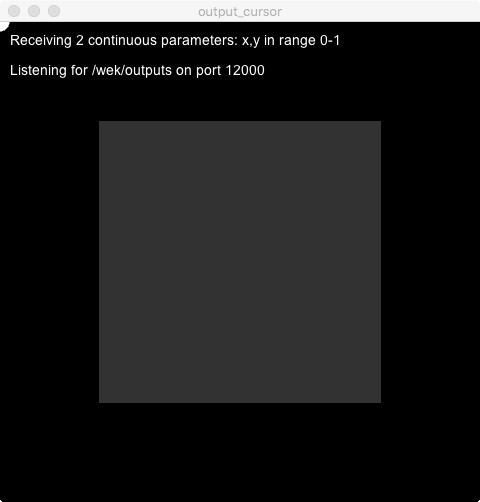
This sketch listens for an X and Y position from Wekinator over OSC port 12000 and plots it on screen.
-
Download Wekinator and run it with the settings below. Hit Next to proceed.
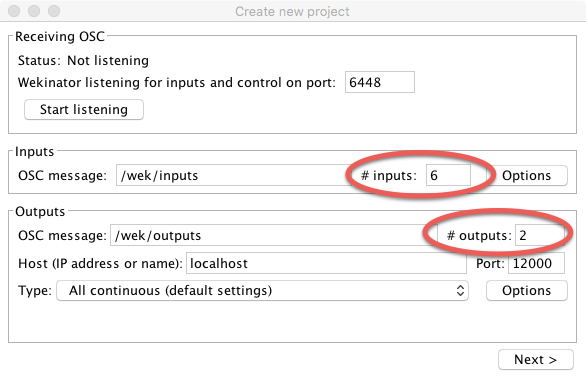
If it works, you should see the following screen.
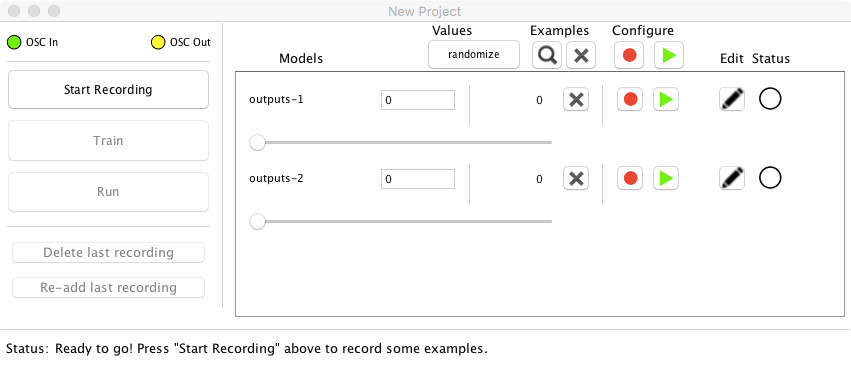
-
Wekinator training.
Use the sliders to choose a cursor position. The Processing sketch should update the virtual cursor position as you drag the sliders.
Press the physical cursor (i.e. the spare alligator clip connected to ground) down on the touchpad at the corresponding position to the virtual cursor.
With the physical cursor held to the touchpad, Press Start Recording, wait a couple of seconds, and then press Stop Recording.
Repeat this process for a grid of different calibration points. If you make a mistake, you can stop the recording, press 'Delete Last Recording', and repeat the last measurement.
Once you're done with data collection, press Train. Depending on how much data you collected, Wekinator will take a few seconds to a minute to train a neural network on your calibration data.
Once the training is complete, press Run. Wekinator will now run as a bridge between your input and output sketch. It has learned the mapping between your input and output, and the output Processing sketch should now display the position of your cursor in realtime.
-
Modify the Processing sketch to do something cool (e.g. make a drawing or a sound) or try another example sketch. (You'll need to redo the training for each example.)
The DIY touchpad was built by Aatish Bhatia and Sharon De La Cruz at the StudioLab with feedback & input from Lian Zhu and Alice Tang. We were inspired by Electrick. The code is free to use and open source. If you have questions or you like what we're building, feel free to drop us a line!