UV Index Monitor Powered By PubNub
Sunburns are terrible for you. The high energy UVB rays from the sun can cause mutations in your genes, and a single sunburn is enough to increase your risk for melanoma. As few as five sunburns nearly doubles your risk for melanoma. The damage to your DNA stacks up over time, and it's important you use protection when you go outside to mitigate the damage to your skin. Unfortunately, sunscreen sucks. It’s sticky, oily, and somehow you always manage to miss a spot on your back only to painfully realize it later. What if there were another way? What if you knew when it was safe to be outside in the open and when to retreat to the shade?
Read the rest of the blog post here.

This project uses a UV index sensor and a ESP8266 development board to read the current UV index level and then publishes the UV index value to PubNub. A second ESP8266 development board with a RGB LED subscribes to the messages published by the sensor and displays the most recent value using color. 0 = off, 1-2 = green, 3-5 = yellow, 6-7 = orange, 8-10 = red, and 11+ = purple. A React Native app for iOS and Android shows the last reported or current UV index, and the app receives push notifications if the UV index is excessive. Additionally, the app displays a realtime chart of the UV index values powered by Project EON and hosted on the GitHub Pages site for this repo.
-
PubNub React V4 SDK - Publish, subscribe, and history in React Native.
-
PubNub Arduino SDK - Publish and subscribe with ESP8266.
-
PubNub Push Notifications - APNS and GCM push notifications with React Naive.
-
Project EON - Realtime data visualization for UV index.
-
Breadboard and Breadboard Jumper Wires
-
RGB LED (common cathode)
Want to learn more about this project, how it was built, or get started from scratch? Check out the blog post. You’ll first need to sign up for a PubNub account. Once you sign up, you can get your unique PubNub keys from the PubNub Developer Portal.

-
Download the latest Arduino IDE.
-
Install Silicon Labs CP210x USB to UART Bridge driver for your OS.
-
You'll need to update the Arduino Board Manager with a custom URL. Open up Arduino and then go to the Preferences (File > Preferences). Then, towards the bottom of the window, copy this URL into the “Additional Board Manager URLs” text box:
http://arduino.esp8266.com/stable/package_esp8266com_index.json -
Navigate to the Board Manager by going to Tools > Boards > Boards Manager. Search for ESP8266. Click on that entry, then select Install.
-
Connect your ESP8266 development board and select it by going to Tools > Boards menu. You may need to select the correct port.
-
Verify that everything works by uploading the blink sketch. The built-in led should be blinking.
-
Install the PubNub Arduino SDK by going to Sketch > Include Library > Manage Libraries. Search for PubNub. Click on that entry, then select Install.
-
You can test the ability for your ESP8266 development board to connect to PubNub by uploading this gist to your development board with the Arduino IDE. Replace "your-ssid" and "your-password" with the SSID and password for your WiFi network. Get your unique PubNub keys from the PubNub Developer Portal. If you don't have a PubNub account, you can sign up for a PubNub account for free. Replace "pub-key" and "sub-key" with your keys.
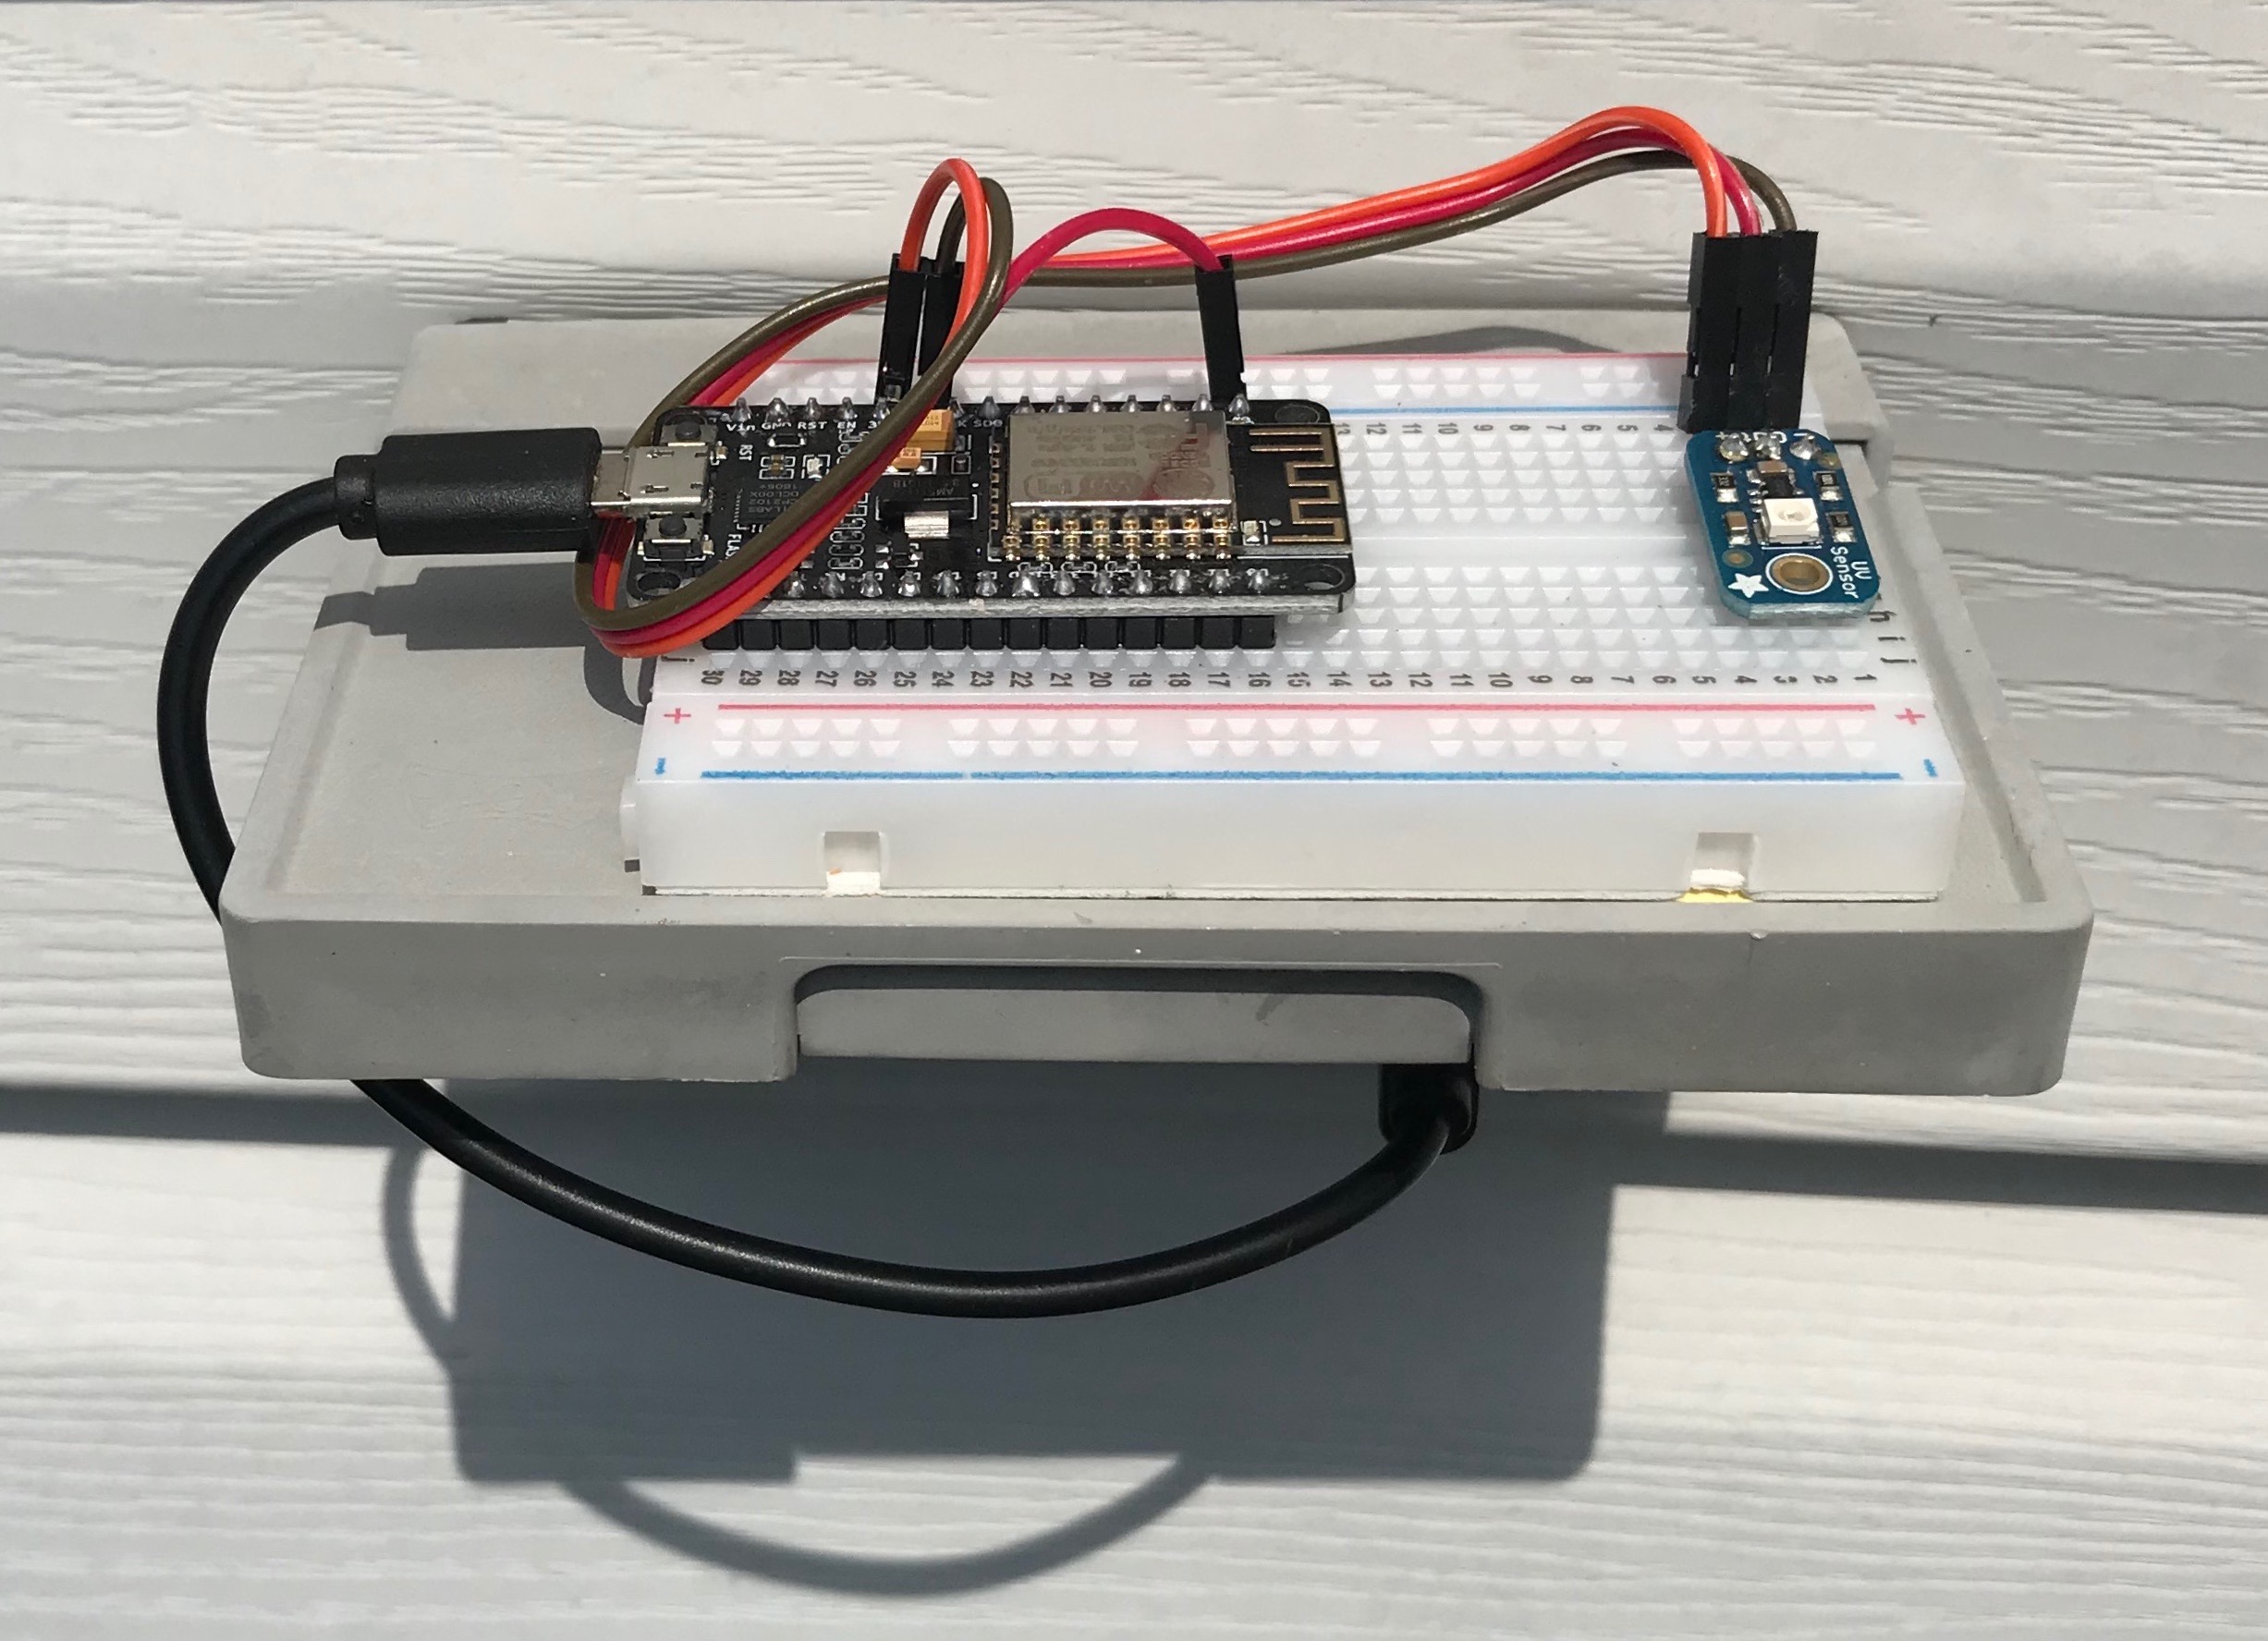
The UV index sensor reads the current UV index levels once per minute and publishes the values to PubNub when the value changes and at least once every 10 minutes.
-
Connect the positive pin of the UV sensor to a 3.3v pin on your development board and connect the ground pin of the UV sensor to a ground pin on your development board. Connect the output of the UV sensor to the analog input on your development board (A0).
-
Test the sensor by going to File > Examples > 01.Basics > AnalogReadSerial. Upload the sketch and check the Serial Monitor for values.
-
Open sensor/sensor.ino in Arduino.
-
Replace "Sensor Network" and "sens0rpassw0rd" with the SSID and password for your WiFi network.
-
Get your unique PubNub keys from the PubNub Developer Portal. If you don't have a PubNub account, you can sign up for a PubNub account for free. Replace "pub-key" and "sub-key" with your keys.
-
Upload the sketch. You can use the Serial Monitor to verify you're able to connect to WiFi and publish your sensor readings to PubNub.

-
Verify the sensor readings are reaching PubNub by going to your PubNub Developer Portal, select the keys your created previously, and create a client in the Debug Console. Set "Default Channel" to "uvindex" and leave the other fields blank. Click "ADD CLIENT." You should see a message with the current UV index within 10 minutes or if the sensor reading changes. You can also reset the development board to force it to resend the current UV index value.
-
Move your UV index sensor to a sunny location within range of WiFi. If you need to place your sensor in a place without power, you could use a USB power bank to deliver power to your development board.
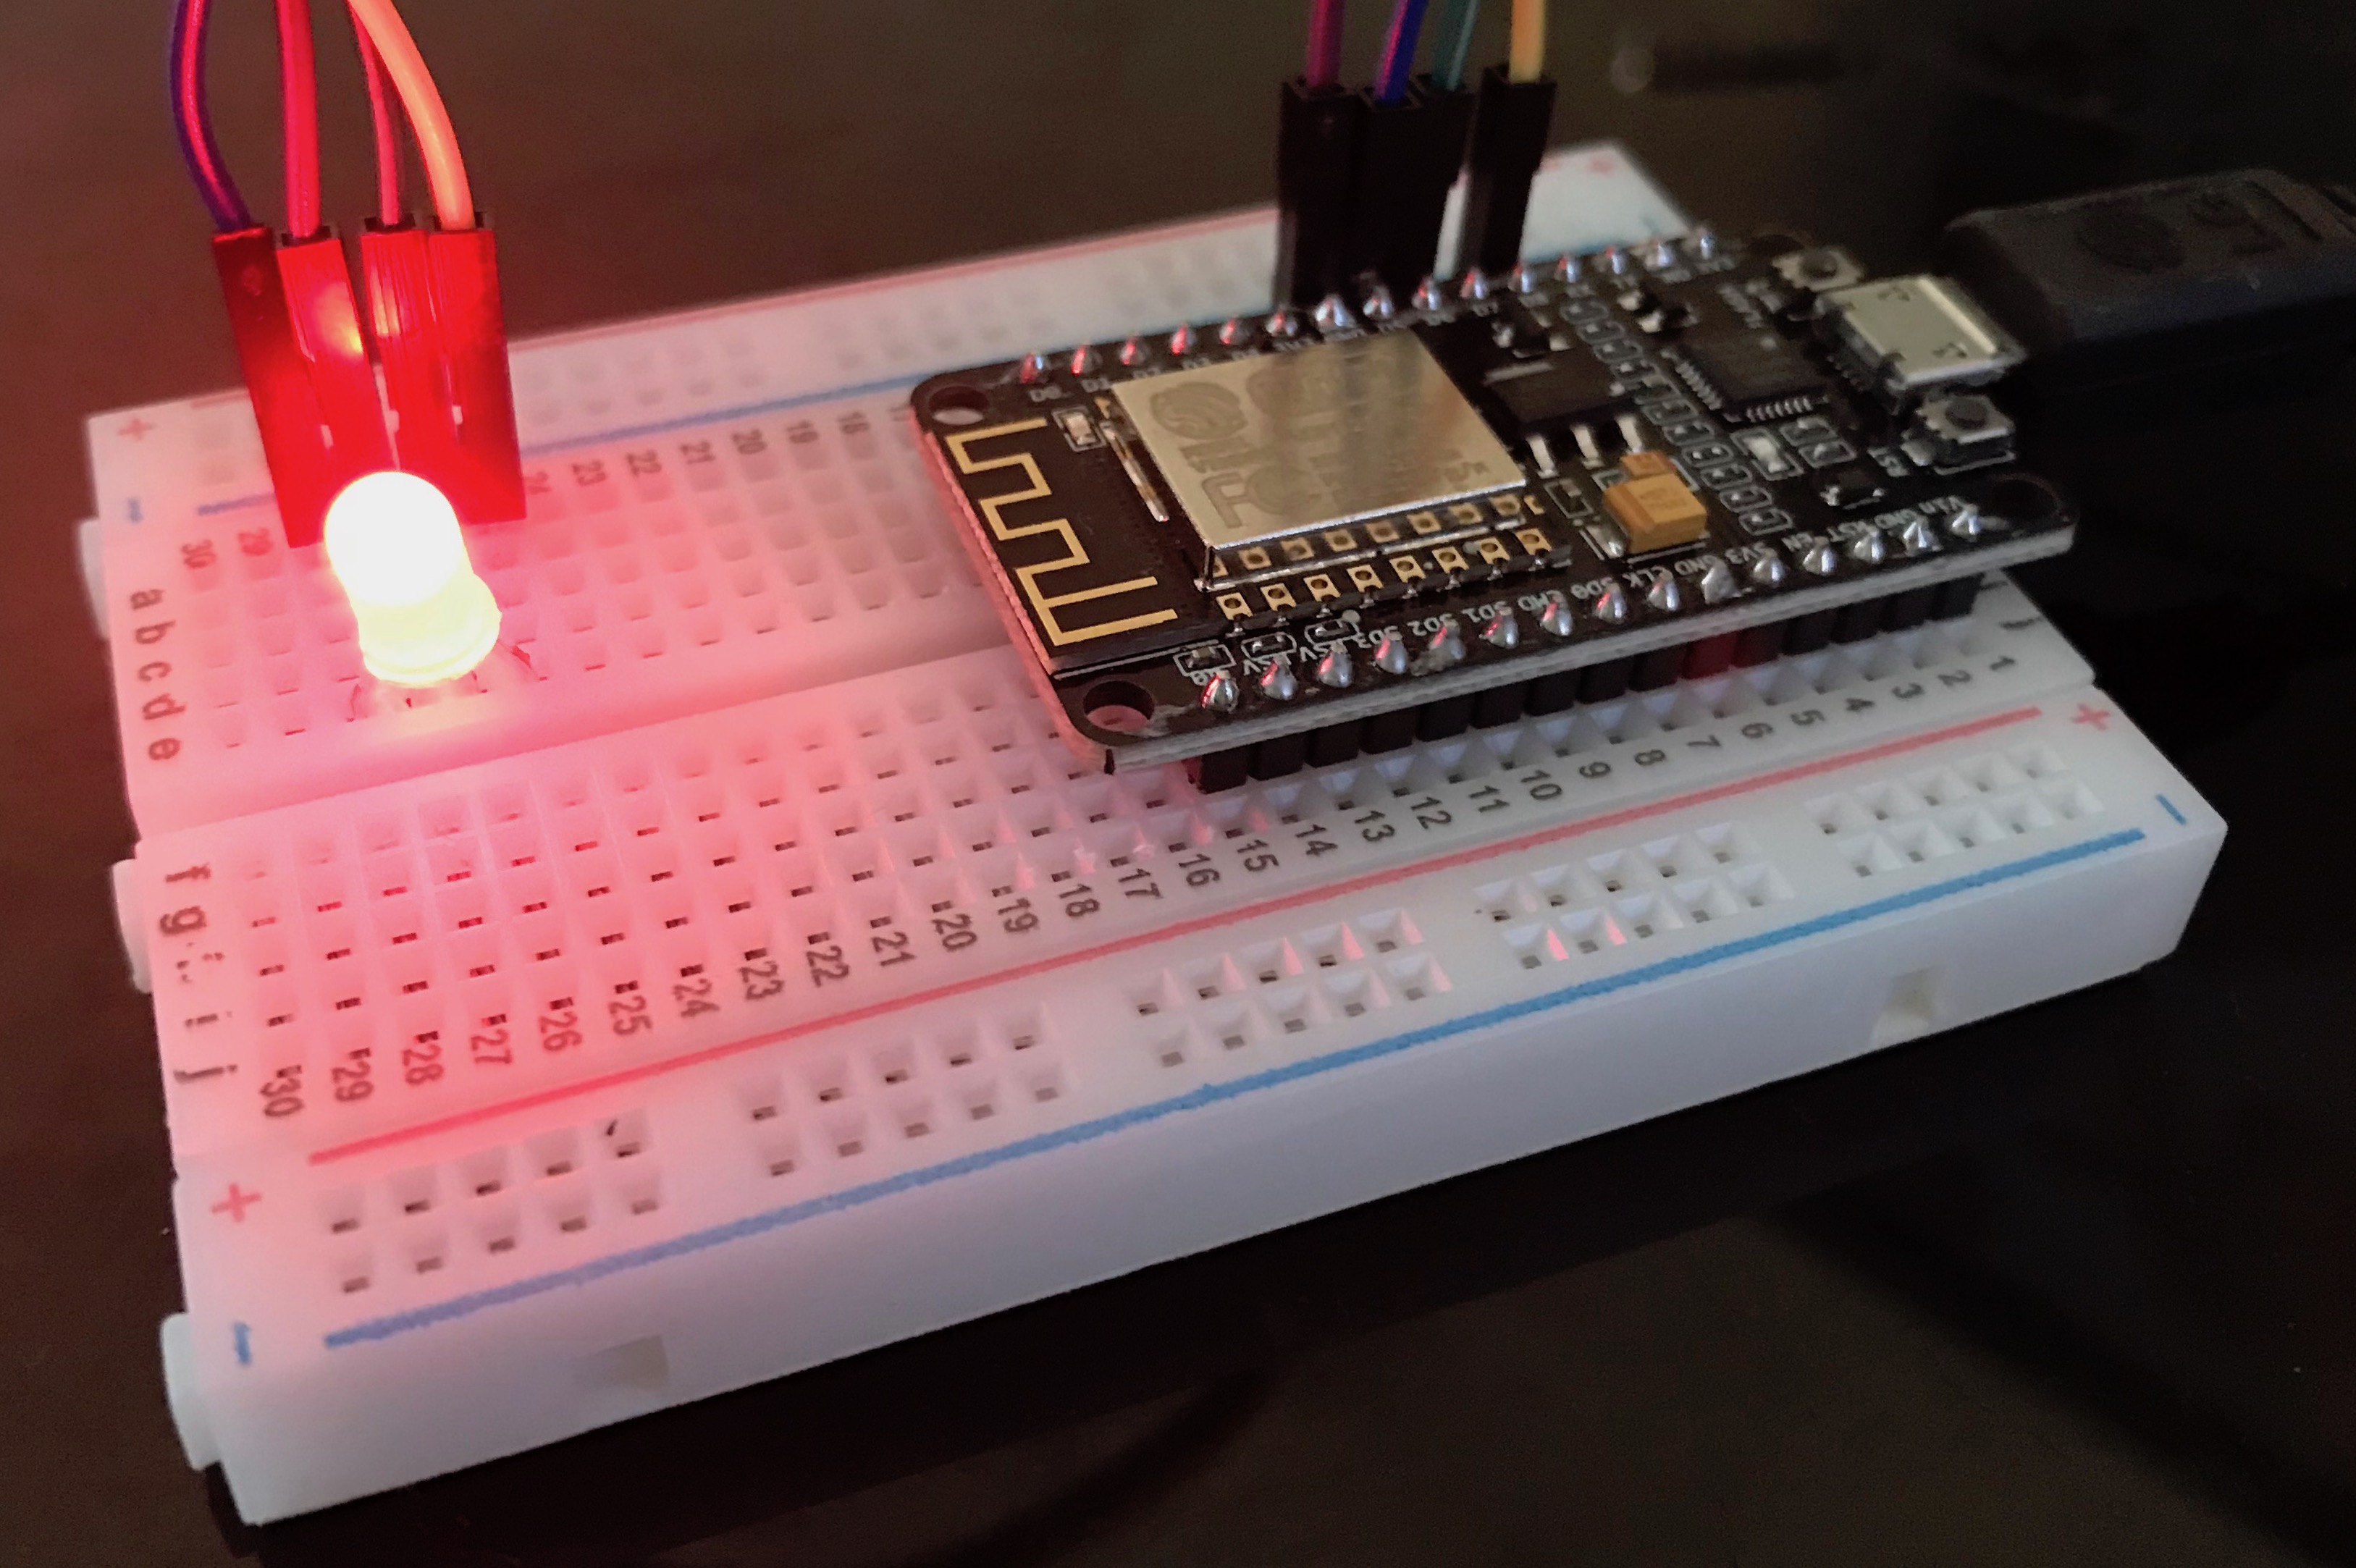
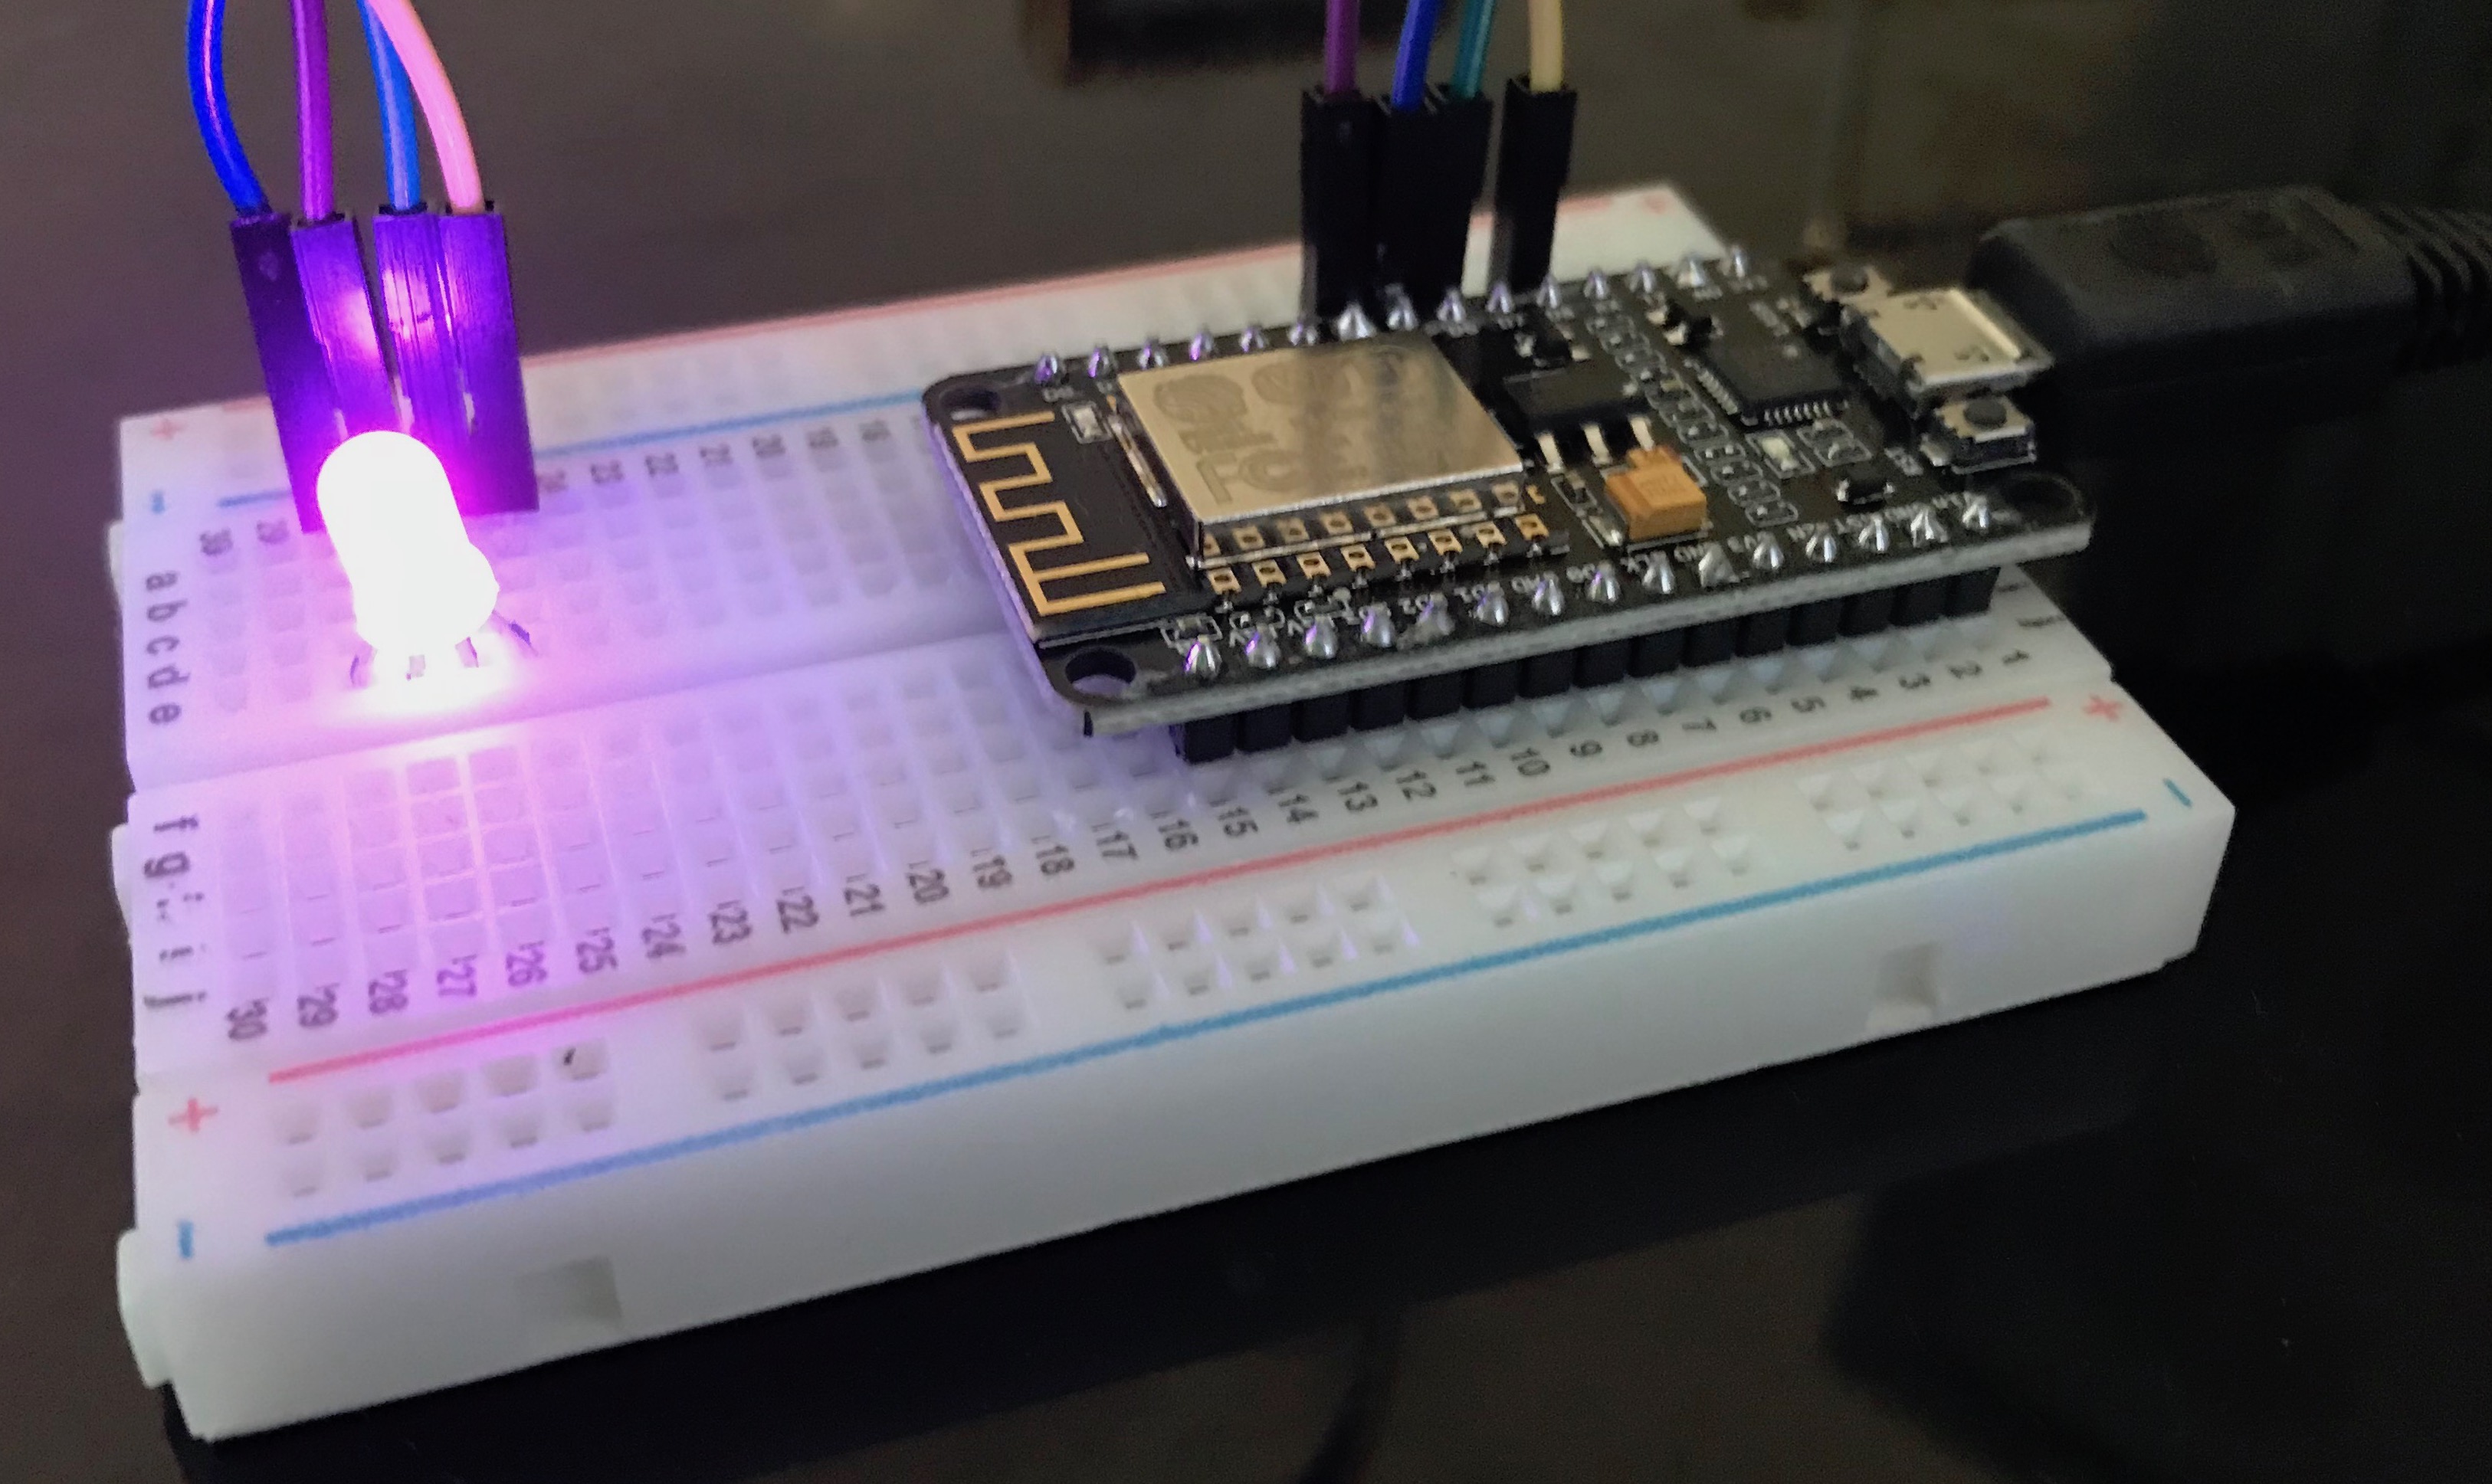
The UV Index Indicator subscribes to the "uvindex" channel and displays the UV index value using color. 0 = off, 1-2 = green, 3-5 = yellow, 6-7 = orange, 8-10 = red, and 11+ = purple.
-
Connect the common ground on the RGB LED to ground on your development board. Connect the red pin to pin 14, green pin to pin 12, and blue pin to pin 15.
-
Open indicator/indicator.ino in Arduino.
-
Replace "Sensor Network" and "sens0rpassw0rd" with the SSID and password for your WiFi network.
-
Get your unique PubNub keys from the PubNub Developer Portal. If you don't have a PubNub account, you can sign up for a PubNub account for free. Replace "sub-key" with your key.
-
Upload the sketch. You can use the Serial Monitor to verify you're able to connect to WiFi and receive your sensor readings from PubNub. You should see a message with the current UV index within 10 minutes or if the sensor reading changes. You can also reset the sensor development board to force it to resend the current UV index value after a 60 second delay.
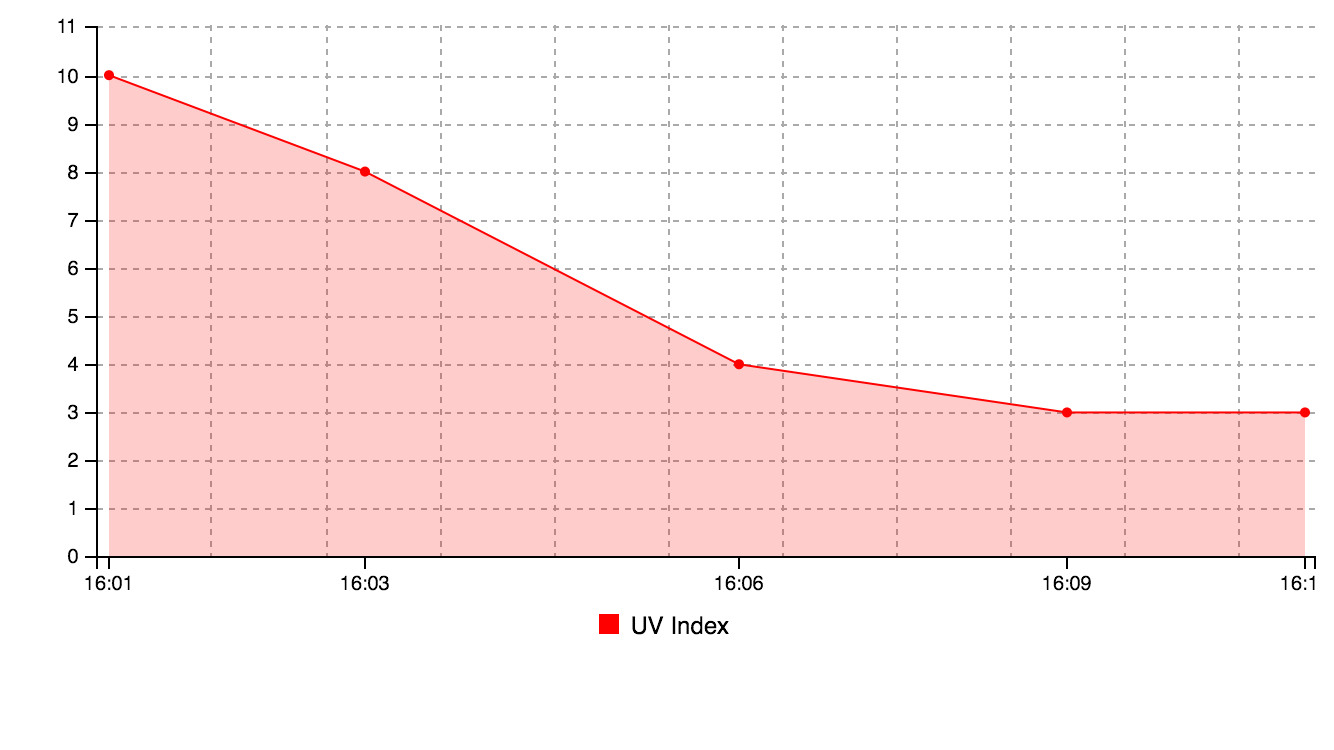
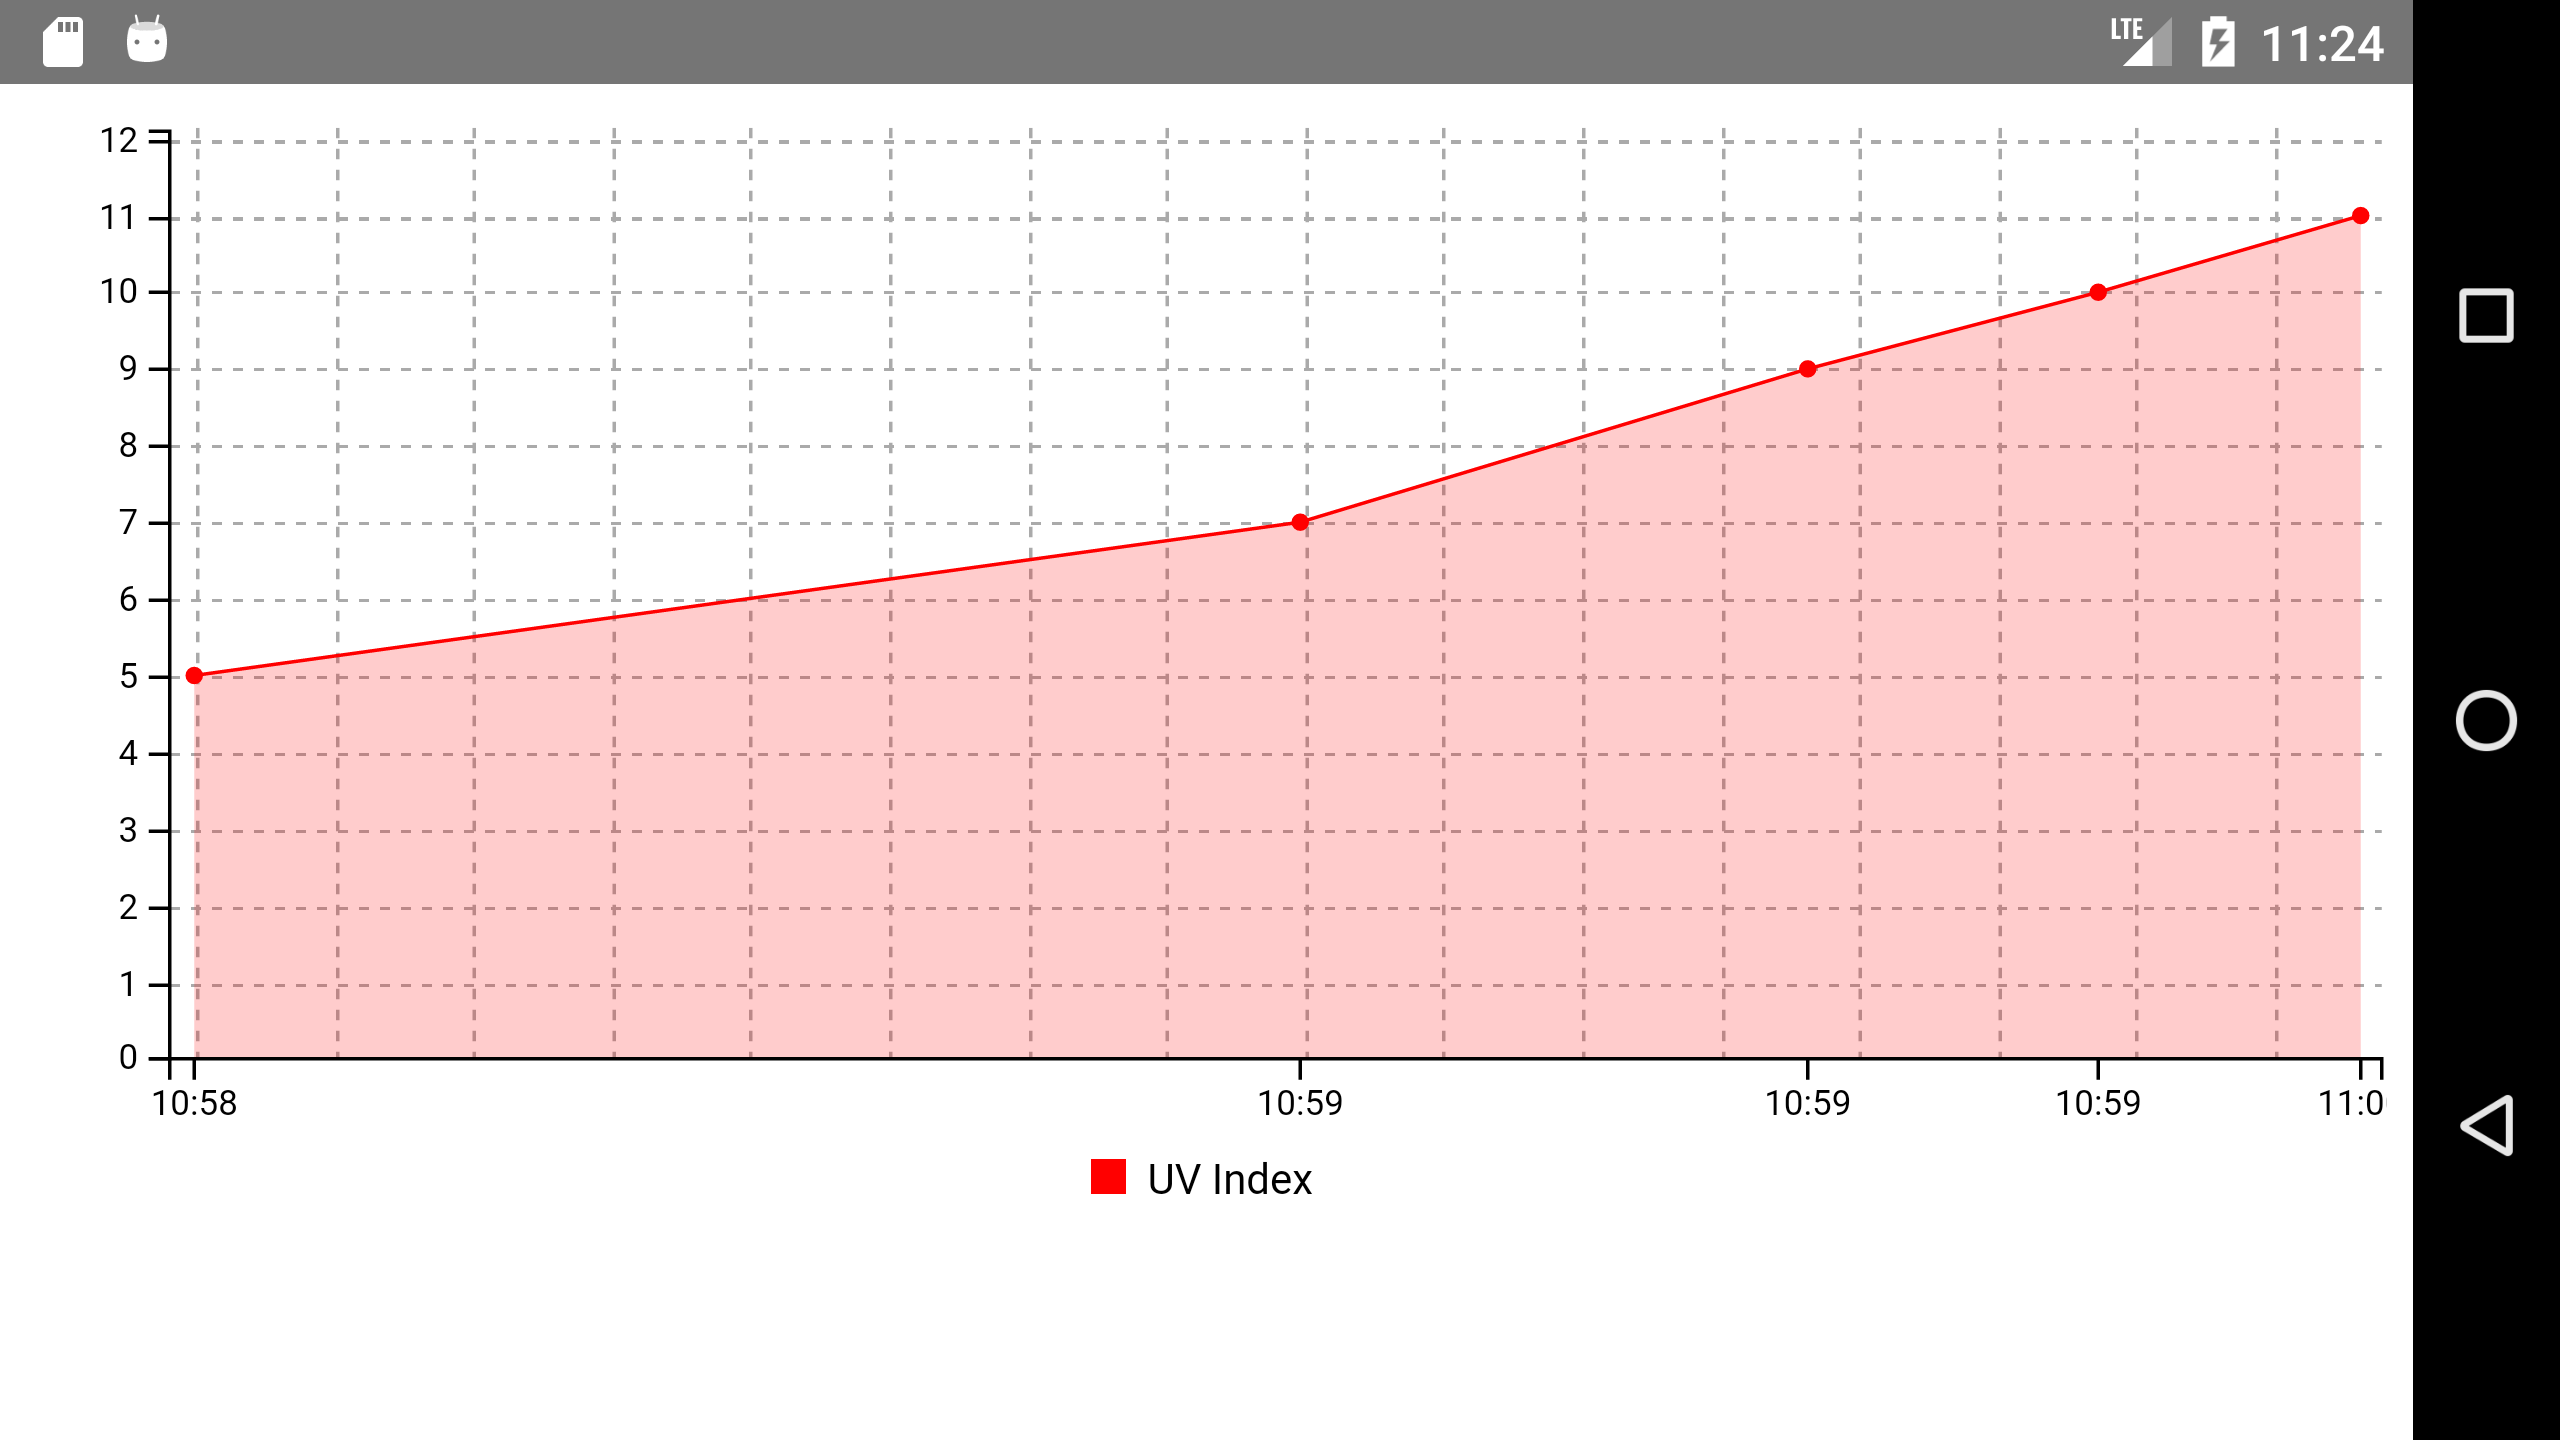
The dashboard is powered by Project EON and shows the last five values from the UV index sensor. To setup your own dashboard, you'll need to fork this repo and setup a new gh-pages site. Alternatively, you can host index.html in another location and follow step 3 below to configure. The dashboard for this repo is located here: https://uvindex.chandlermayo.com/
-
Fork this repo and clone.
-
Switch to the gh-pages branch.
git checkout gh-pages
-
Get your unique PubNub keys from the PubNub Developer Portal. If you don't have a PubNub account, you can sign up for a PubNub account for free. Edit index.html and replace the subscribe key with your key.
-
Commit to the gh-pages branch to update your subscribe key and trigger a page build:
git add index.html
git push origin gh-pages
- Your copy of the dashboard should now be online. Learn more about how to setup a GitHub Pages site here.

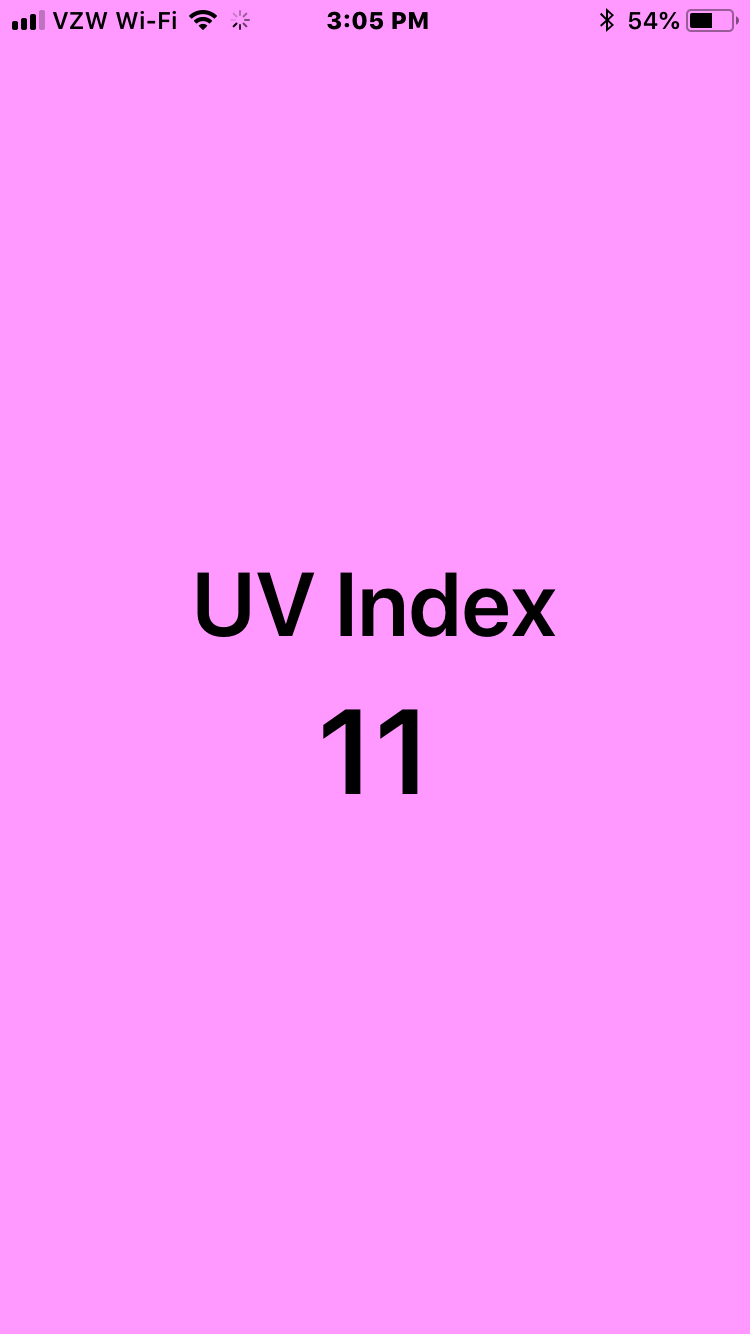
When the app is first opened it retrieves the last UV index value and displays that value so the user doesn't have to wait for the sensor to send a new message. Then each time the UV index is updated, the app should refresh to display the new value. The app also displays the dashboard chart when the app is in landscape.
-
Install React Native. Be sure to follow the guide for "Building Projects with Native Code" to be able to install on a device.
-
Get your unique PubNub keys from the PubNub Developer Portal. If you don't have a PubNub account, you can sign up for a PubNub account for free.
-
Edit UVINFO/App.js and replace "sub-key" with your key and replace "https://uvindex.chandlermayo.com/" with the url for your dashboard. Save the file.
-
Make sure you're in the UVINFO directory.
cd UVINFO
- Install project dependencies.
npm install
- Test the app in the iOS simulator. It may take some time to build the project.
react-native run-ios
- Follow this guide to install on your device (iOS or Android).
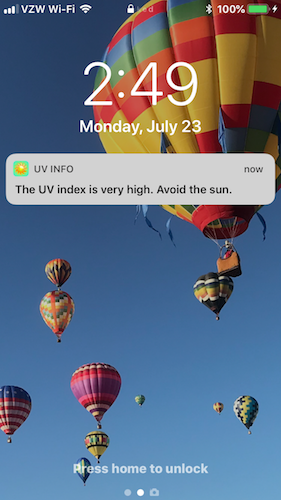
Bridge native PubNub publishing with Apple Push Notification Service for iOS push notifications with React Native. Requires paid enrollment in the Apple Developer Program. Receive push notifications when the UV index is very high (>7) and a maximum of once every 15 hours.
-
Using the iOS push notification enabled fork of the repo follow the "UV Index Sensor" instructions above.
-
Using the iOS push notification enabled fork of the repo follow the "Setup UVINFO React Native App" instructions above.
-
Provision APNS and PubNub with tokens.
-
Manually link the PushNotificationIOS library.
-
Install the app on a iOS device to test push notifications.
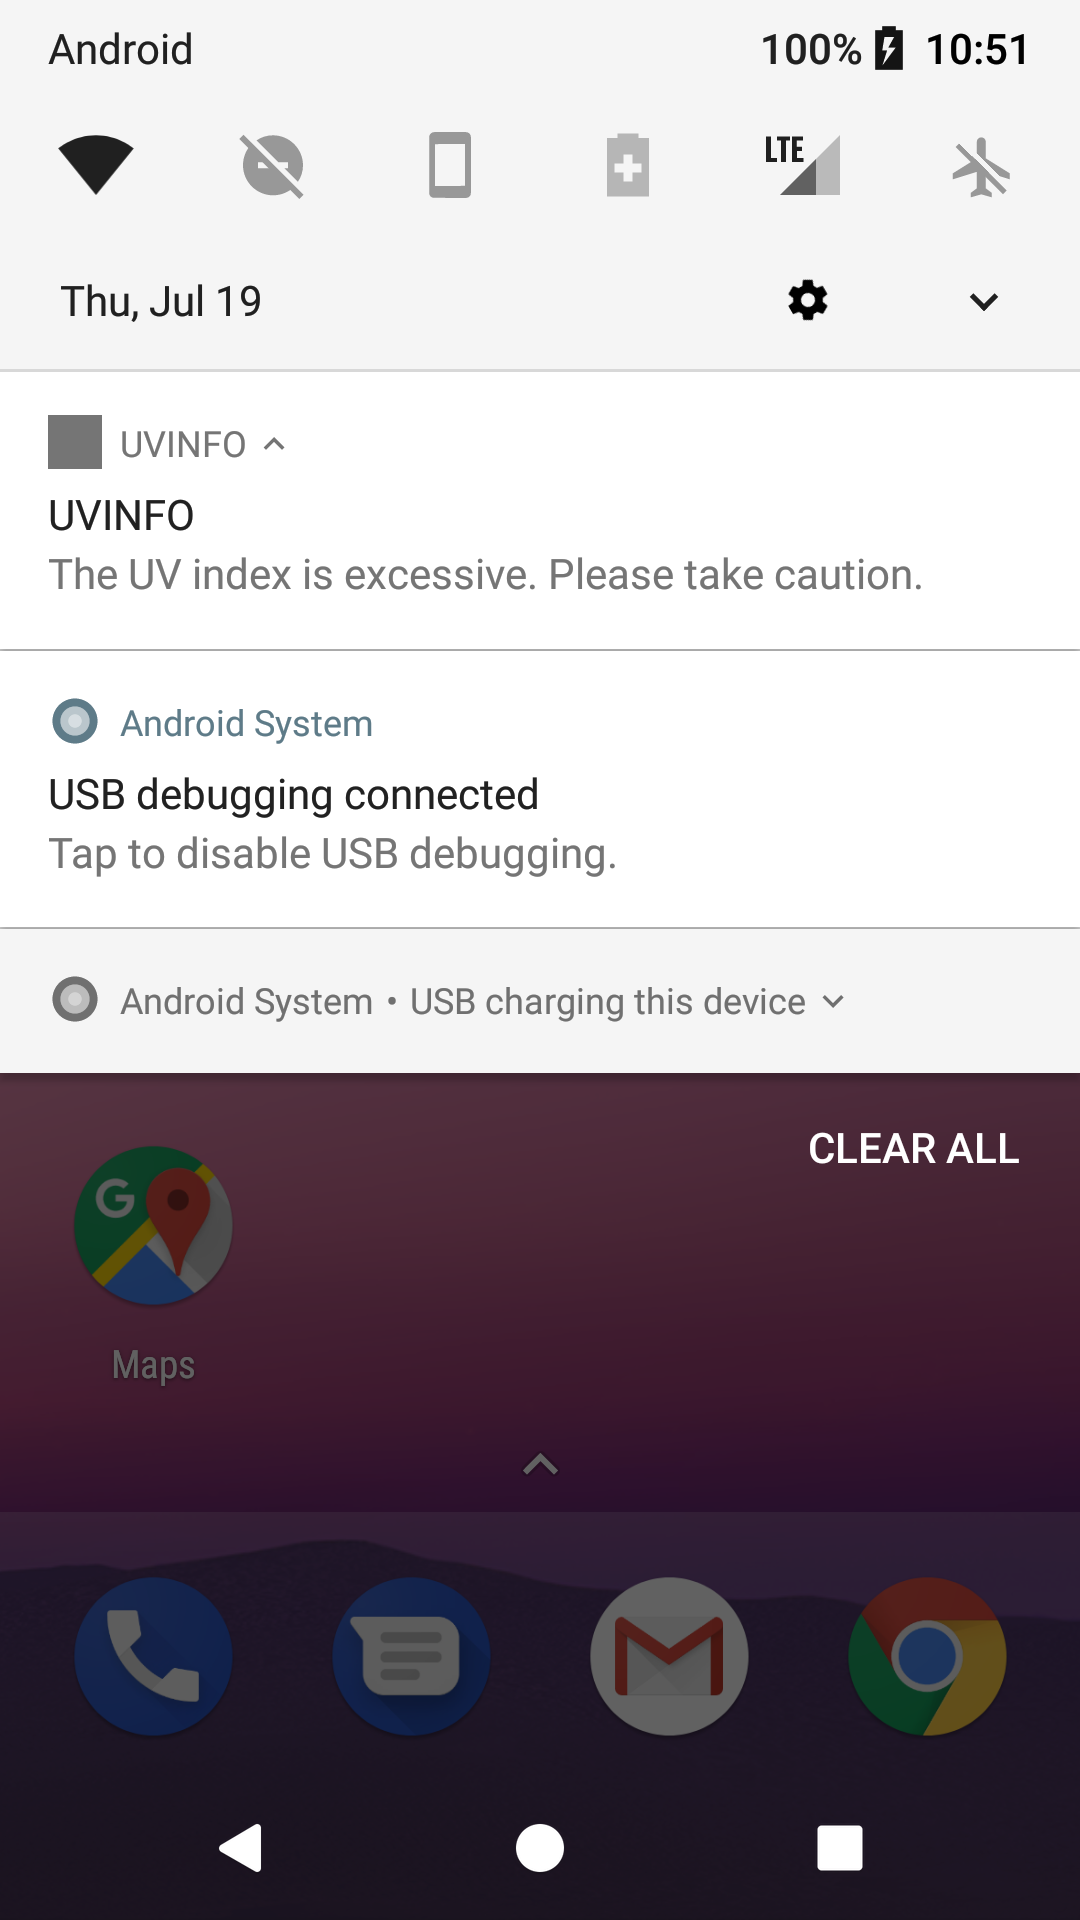
Bridge native PubNub publishing with Firebase Cloud Messaging for Android push notifications with React Native. Receive push notifications when the UV index is very high (>7) and a maximum of once every 15 hours.
-
Using the Android push notification enabled fork of the repo follow the "UV Index Sensor" instructions above.
-
Using the Android push notification enabled fork of the repo follow the "Setup UVINFO React Native App" instructions above.
-
Visit the Firebase console.
-
Click on the "Add project" box.
-
Enter project details and press the continue button.
-
Go to your PubNub Developer Portal and enable Mobile Push Notifications for the key you created for setting up the app. Enter your API key from the project you created in the Firebase console.
-
Run the app in the Android Emulator or on a device to test push notifications.