


驱动已签名,由于使用泄露签名,使用前请关闭杀毒软件。
- 基于intel vtx && ept 技术
- 不与其它反反调试插件冲突
- IsDebuggerPresent
- CheckRemoteDebuggerPresent
- Process Environment Block (BeingDebugged)
- Process Environment Block (NtGlobalFlag)
- ProcessHeap (Flags)
- ProcessHeap (ForceFlags)
- NtQueryInformationProcess (ProcessDebugPort)
- NtQueryInformationProcess (ProcessDebugFlags)
- NtQueryInformationProcess (ProcessDebugObject)
- NtSetInformationThread (HideThreadFromDebugger)
- NtQueryObject (ObjectTypeInformation)
- NtQueryObject (ObjectAllTypesInformation)
- CloseHanlde (NtClose) Invalide Handle
- SetHandleInformation (Protected Handle)
- Hardware Breakpoints (SEH / GetThreadContext)
- NtYieldExecution / SwitchToThread
- Process jobs
- Memory write watching
仅聚焦内核模式能处理的检测功能 (如有遗漏或你有任何想法、建议请告诉我
测试程序:al-khaser
- win7 x64 (
6.1.7600) - win10 19h1 x64 (
10.0.18362.XXXX)
- 现支持x64dbg,而且会持续更新...
- 不会支持OD 支持OD?点击回复投票
- 计划支持
已支持windbg、cutter、ghidra 。后俩者需要它们本身先支持调试功能
- 使用
PDBDownloader.exe下载ntoskrnl.exe的pdb文件 (默认在下载在C盘

- 使用
MVConfigBuild.exe ntoskrnl.pdb生成config.mv配置文件 并将之移动到c盘根目录C:\
管理员启动CMD:
MVConfigBuild.exe
C:\symbols\ntkrnlmp.pdb\hashxxxxxxxxxxxxxxxxxxxxxxxxxxxxxxxxxxx\ntkrnlmp.pdb(你应该确保MVConfigBuild.exe和msdia140.dll在同一目录下

可用离线版:离线版config (每个人都可以上传相应版本配置到此仓库.
格式:[版本.mv] 比如 :10.0.18362.295.mv(可以使用cmd查看

-
文件放置
- x64dbg:
将
MirageV.dp32、MirageV.dp64移动到对应\plugins\目录下
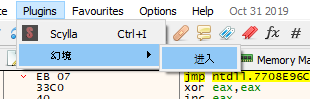
- 运行:菜单栏-插件-幻境-进入
- windbg:
将
MirageV.dll移动到对应\Debuggers\bit??\目录下
- 运行:
windbg -a MirageV.dll - 再次运行:
!MirageVRun
- 驱动:
将
Mirage.sys移动到C:\Windows\System32\drivers\目录下
- 使用
- 附加
输入进程id - 点击
附加进程- 点击开启

- 启动调试
直接点击开启

未来的某一天会公开代码...