This is an easy to use single touch button with status indicator to control the Home Assistant Alarmo Alarm System without using a phone/tablet touch screen.
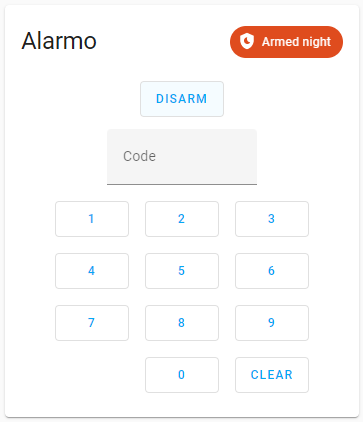
Alarmo works great with Home Assistant Alarm Panel Card, but it user interface needs to be displayed in a Smartphone or Tablet where Arming button options are made available as well as the keypad to disarm the alarm system. It may not be feasible sometimes (in my case) to place the touch screen devices next to the doorway. This has led to possible false alarm triggering due to opening the door accidentally without knowing that it was not disarmed. With Alarmo OneTouch, the illuminated button will indicate the arming status, and with a touch on the button, Alarmo can also be controlled with ease.
The LED on the button itself indicates the current status of the alarm e.g Arming, Armed Away / Armed Night / Armed Home, Pending, Disarmed, Triggered or Offline. A buzzer produces short beeps during Arming & Pending, and continuous beep when the alarm status is Triggered.
Blink the LED & beeps according to status of alarmo/state:
- LED glow/fade - MQTT connection error status / offline / reconnecting
- fast blink - Pending or Arming status
- short beep every 5s if exit / entry delay (Arming/Pending) status
- slow blink – Armed status (armed_away / armed_home / armed_night)
- LED off – Disarmed status (single fast blink every 5s if connected)
- LED on – Triggered status
- short beep if valid command sent
The button reads user clicks to determine the number of press count. The press count is then being mapped with the command to be sent.
- 1 press - Arm Away
- 2 presses - Arm Night
- 3 presses - Arm Home
- 4 presses - Disarm
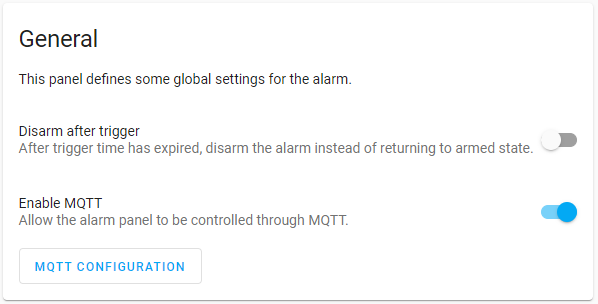
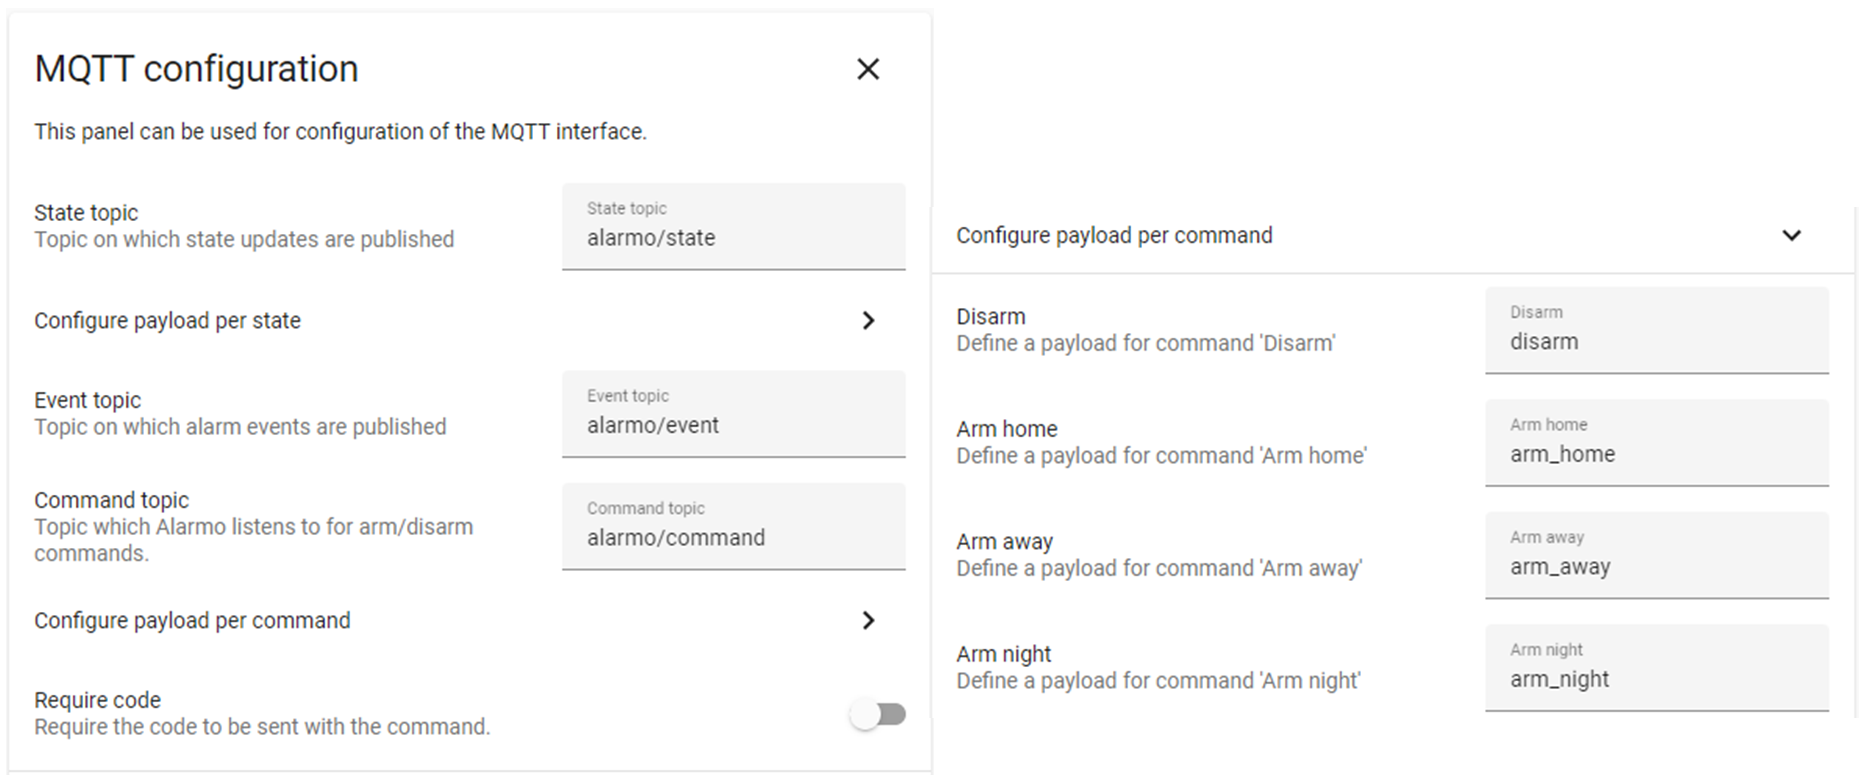
On power up, the device will look for the preset Access Point SSID to connect. If it failed to connect, it will enable AP mode and a host (Laptop or Smartphone) can then connect to the device and configure it's connection parameters in it's web configuration portal. Alarmo OneTouch connects to Home Assistant through Wi-Fi and using MQTT. MQTT needs to be enabled in Alarmo General Configuration. The device subscribe and listens to the State topic.

On a valid button action, it publishes the specific commands to the Command topic and indicate successful transmission with a short beep. The Command payload used are as per default setting. To make it simple, code is not required to be sent together with the command.
The device will auto reconnect if it is disconnected from the AP or MQTT server. If the device is moved away permanently from the earlier connected AP, the device can be setup again to connect to a new Access Point. I have installed the Alarmo OneTouch device on the doorway, as well as in the car. When my car approaches the gate, the device automatically reconnects to my home Access Point, and I use it to disarm upon entering the gate.
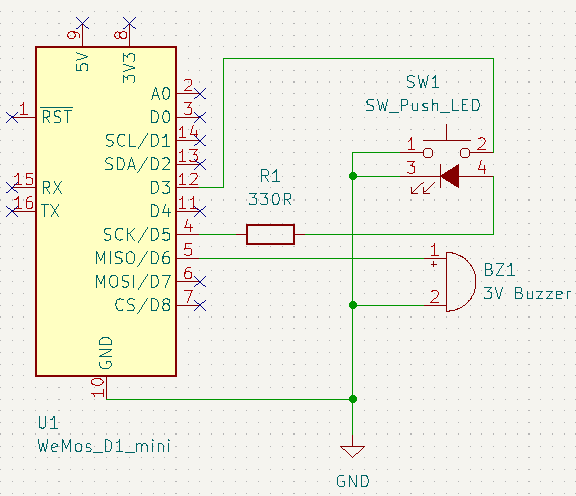
The circuit is pretty straight forward. Only 3 IO pins are used from the WeMos D1 Mini module to connect with the switch, LED and buzzer. D3 has an internal 10K pull-up resistor and hence it is connected to the tactile push button directly. When the tactile switch is being pushed, the state of D3 input will change to logic low. D5 and D6 are set to be active-high GPOs which drives the LED and buzzer directly. The device is powered directly from the 5V USB port when it is being plugged in.
The WeMos D1 Mini is a good choice as it enables a standalone wireless web server application for status monitoring and device setup. The devices turns itself as an Access Point (AP) for configuration and can be acessible at http://192.168.4.1. Once configured, it will operate as Station (STA) and connects to the designated WiFi router / Access Point.
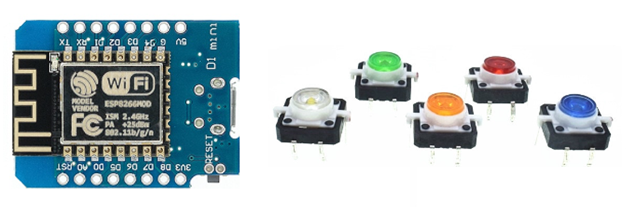
WeMos D1 Mini & Tactile Push Button Switch Momentary Tact 12X12X7.0mm with LED Lights:
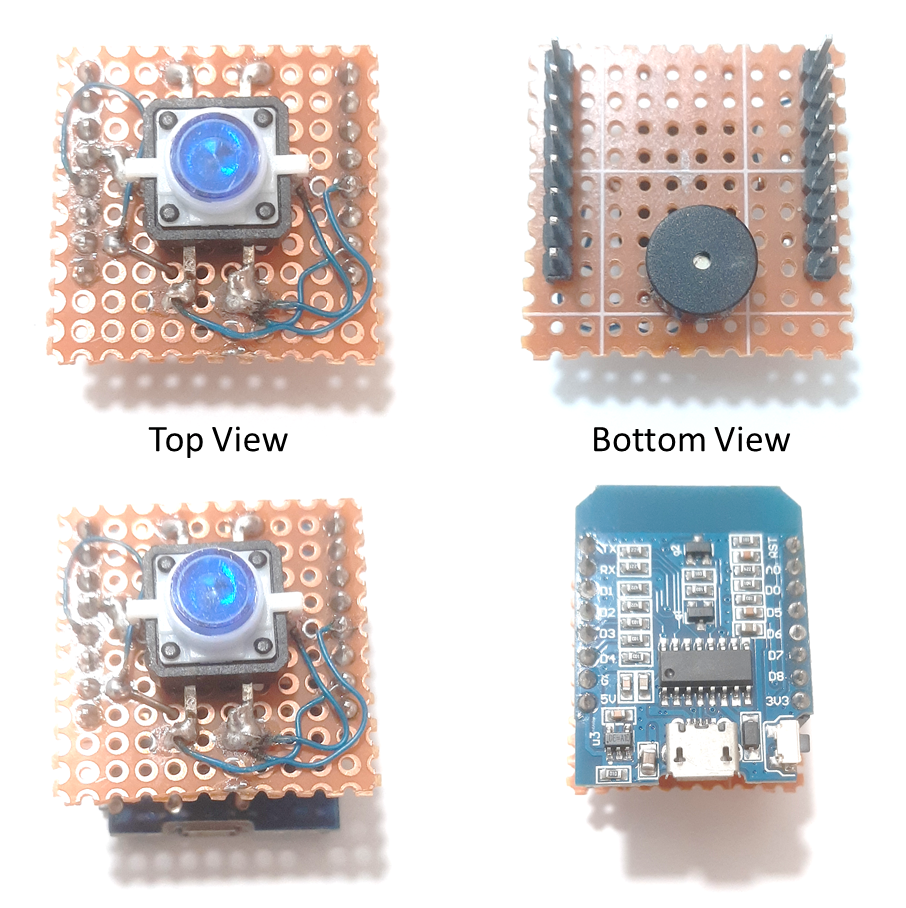
The few components can be easily wired up on a small prototyping board stacking ontop of the WeMos D1 Mini. Then, compile and load the code using Arduino IDE and we are all set. The final step is to setup the login credentials to the AP, and it is then ready for action!
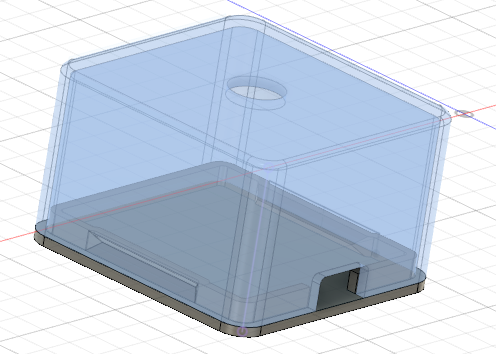
I have also designed a custom 2-piece snap-fit enclosure which can be easily 3D printed to house the electronics safely while exposing the button and the USB port. This enables a standard USB cable to be plugged into the device for power / programming / view debugging messages via serial port terminal. If the device is intended to be wall mounted, an external power source e.g AC-DC module housed in an internal wall switch bracket can provides 5V power to the device through the USB opening at the enclosure.